“12 Days of Drawing Sale” 2

avocet


Don’t miss out on these one-of-a-kind original drawings!

“Avocet” A graceful shorebird native to where I live on the west coast of California.

8.75×14″ graphite on paper

$125

Payment accepted through PayPal (within 24 hours or piece will be made available again). US shipping is included, as is sales tax when applicable.

To purchase: Leave a comment with “Sold”. I will reply and request mailing information. All work subject to prior sale.

10% of the purchase price will be donated to the Mongolian Bankhar Dog Project. https://www.bankhar.org/


“12 Days of Drawings Sale” 1

Don’t miss out on these one-of-a-kind original drawings!Donrelaxed

Don’t miss out on these one-of-a-kind original drawings!

“Relaxed” A wonderful African lion I saw in Kenya in 2004

13.5×9.5″ graphite on paper

$150

Payment accepted through PayPal (within 24 hours or piece will be made available again). US shipping is included, as is sales tax when applicable.

To purchase: Leave a comment with “Sold”. I will reply and request mailing information. All work subject to prior sale.

10% of the purchase price will be donated to the Mongolian Bankhar Dog Project. https://www.bankhar.org/


It’s Time For “The 12 Days of Drawings Sale”!

relaxed
PREVIEW:”Relaxed” graphite on paper (African lion I saw in Kenya in 2004).

I love to draw! And I love to draw animals the most!

For the third year I will be offering one-of-a-kind original drawings of a variety of species. They are created in graphite on acid-free bristol vellum paper and are unframed. All will be under $200. Payment accepted through PayPal. Shipping is included, as is sales tax when applicable.

The drawings will be posted here on my blog and also on Facebook, Instagram, Pinterest and Twitter. All work will be subject to prior sale. On December 30, any unsold work will be listed in a new gallery on my website.

Thank you for your interest! And Happy Holidays!


Experimenting…

strathmore-300

Three out of the last four years I’ve had exhibitions to paint for. I didn’t plan it that way, it’s just how it worked out. But what that means is creating a body of work with a deadline. It’s not the time to experiment, dork around and try new media and materials. You go with what you know. I don’t have an exhibition coming up for at least another year or so, but will have juried competitions and exhibitions to do new work for starting in January. So I finally have breathing space to explore, experiment and maybe integrate some new tools and techniques into my process or just do for fun. One part of that has been “gray studies” and you can see some of them here.

For the last few days I’ve been trying out Derwent Graphitone pencils on a variety of papers. When you’ve been at this as long as I have, art materials accumulate, including paper. Digging around in my flat file paper drawers and looking over my sketchbook options, I found 15 different ones to try, including also a a hot press watercolor block. The Graphitone pencils are water-soluble graphite. I use a waterbrush to wet them, so the paper has to be able to take that without buckling.

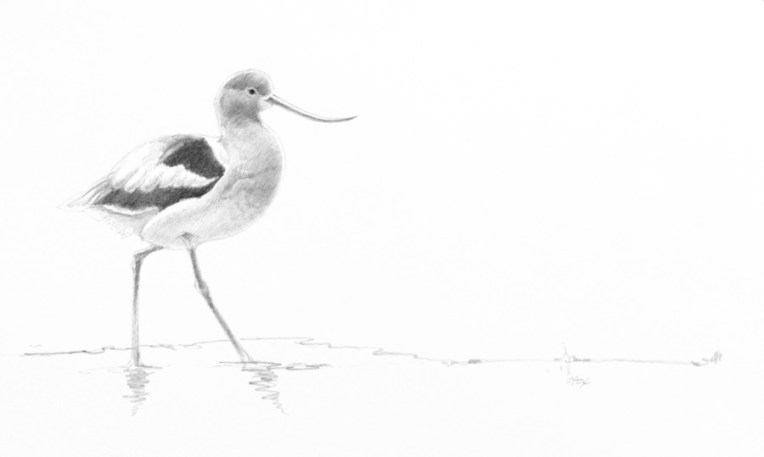
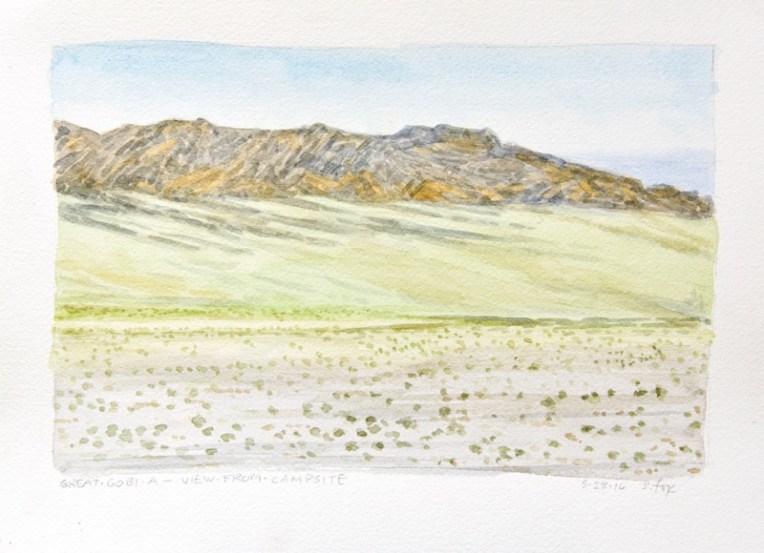
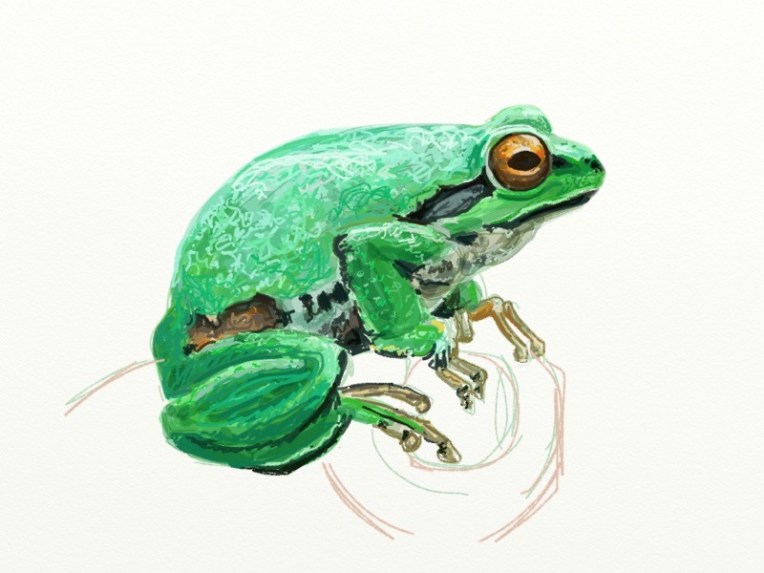
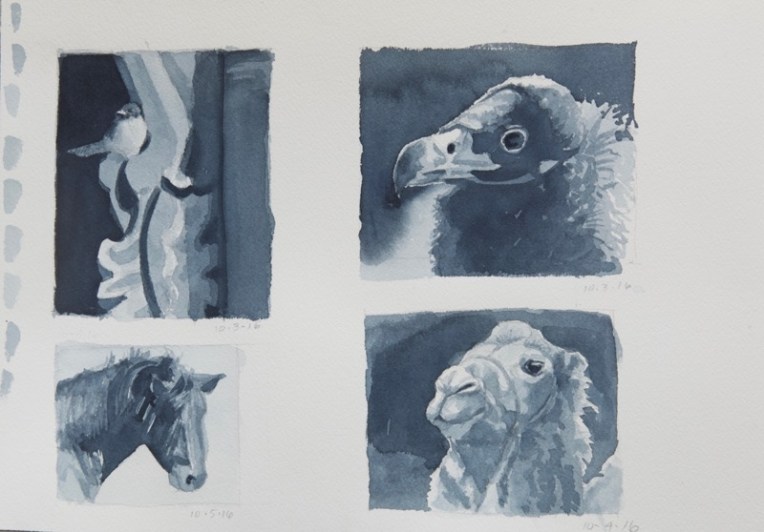
What I was after was a forgiving surface that could be layered, would let me control the damp to wet graphite and end up with something that was visually pleasing. Most did ok, but some have made the short list, including the piece at the top, done on Strathmore 300 vellum bristol. It’s 100lb. which worked fine, but a thicker ply would be even better.

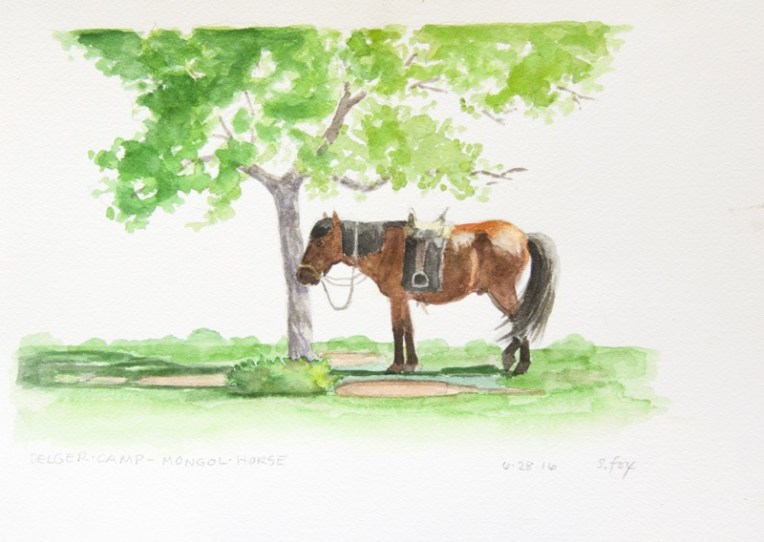
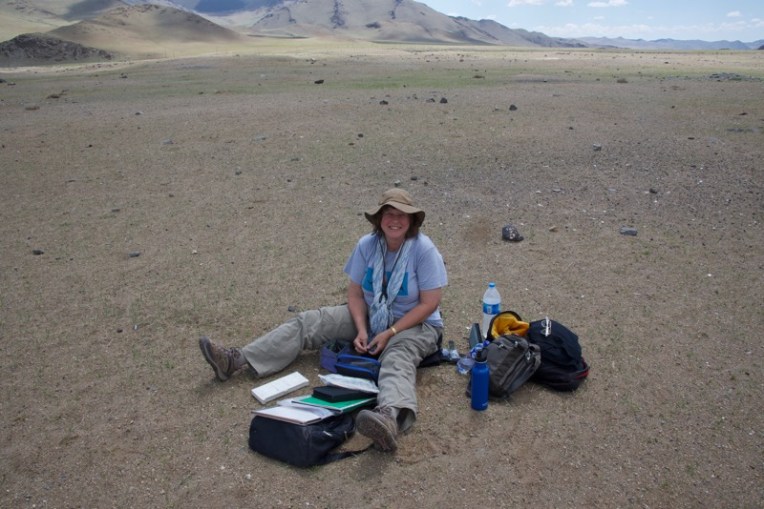
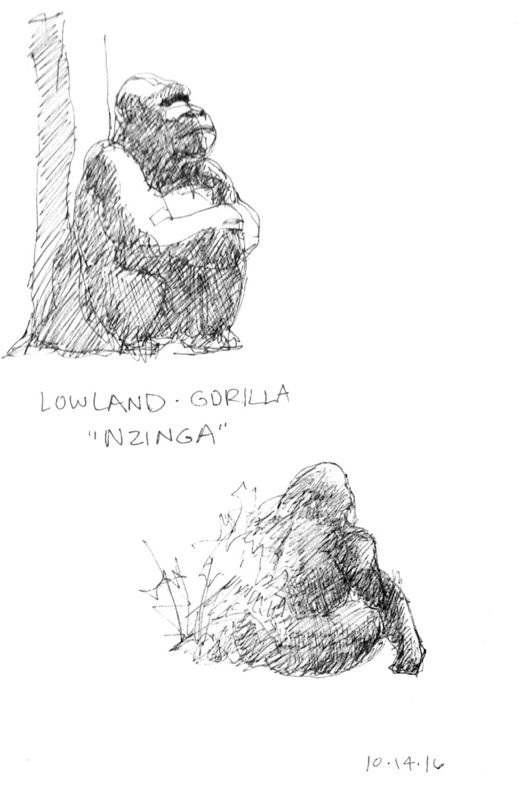
None of these are more than, at most, couple of inches in height and took no more than about twenty minutes. I need to get better at doing humans, so I used some of my Mongolia people reference and got a two-fer out of it.

woman-letraset-illust-bd-hot-press

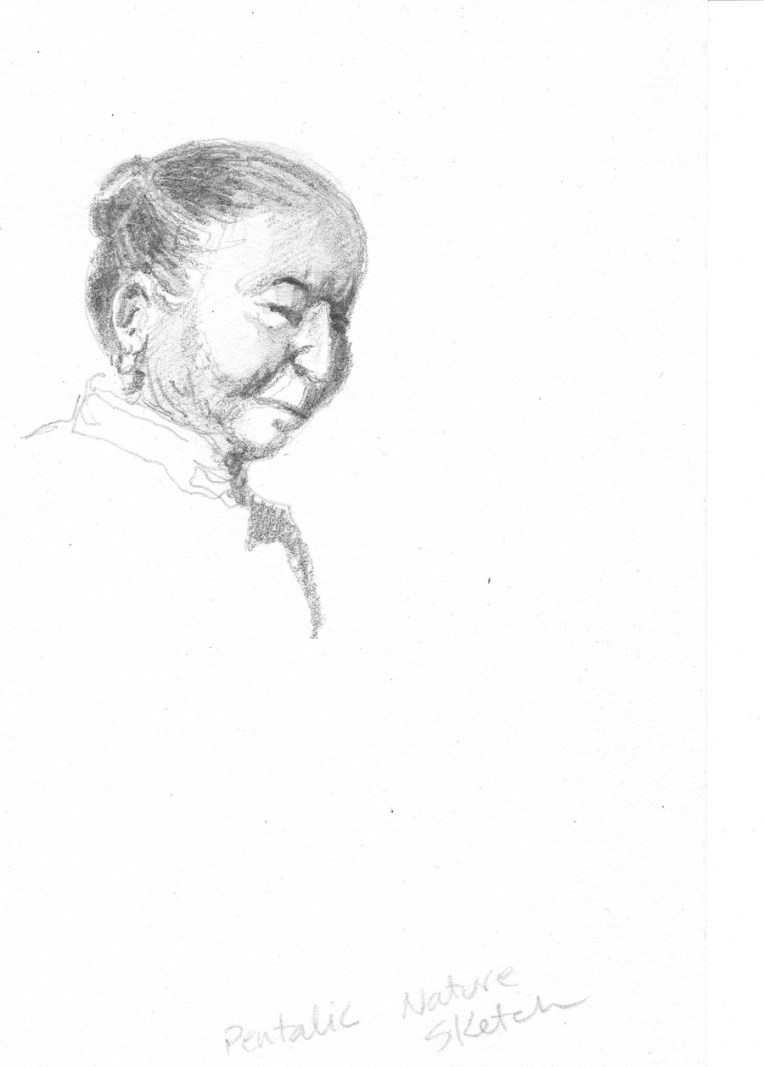
The woman above was done on, as you can see, Letraset hot press illustration board. I liked the result, but I’m not sure about carrying a small pile of boards around if I want to use this technique on location, expecially Mongolia.

hot-press-1

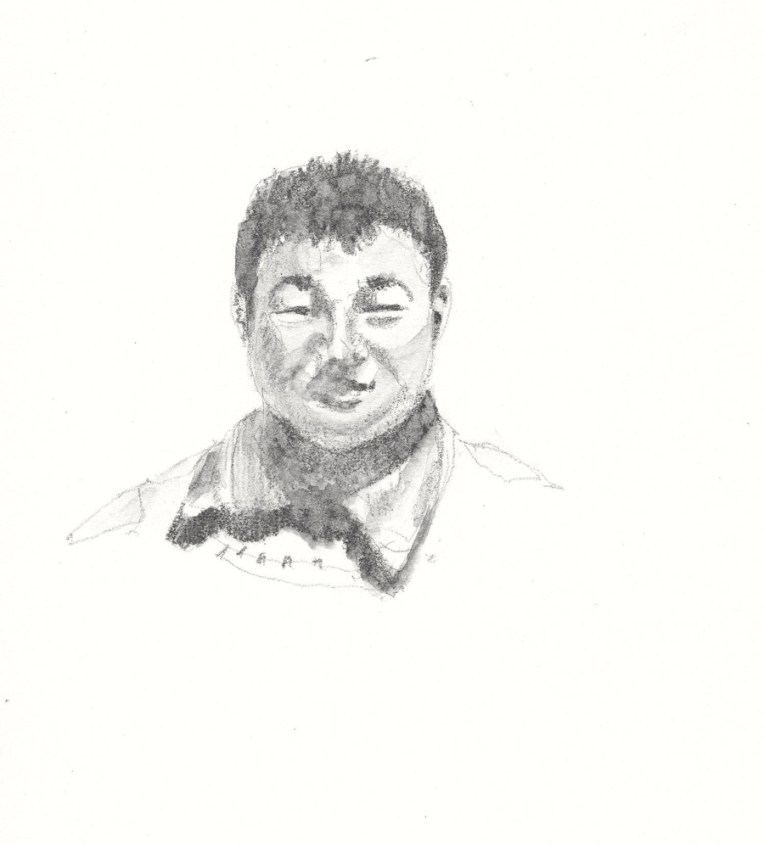
For the wrestler I used a Strathmore bristol vellum 476-2 that I found at the bottom of the flat file drawer. I only knew what it was because I’d jotted the name in the corner.  It wasn’t bad, but I have no idea if it’s still available.

pentalic-nature-sketch

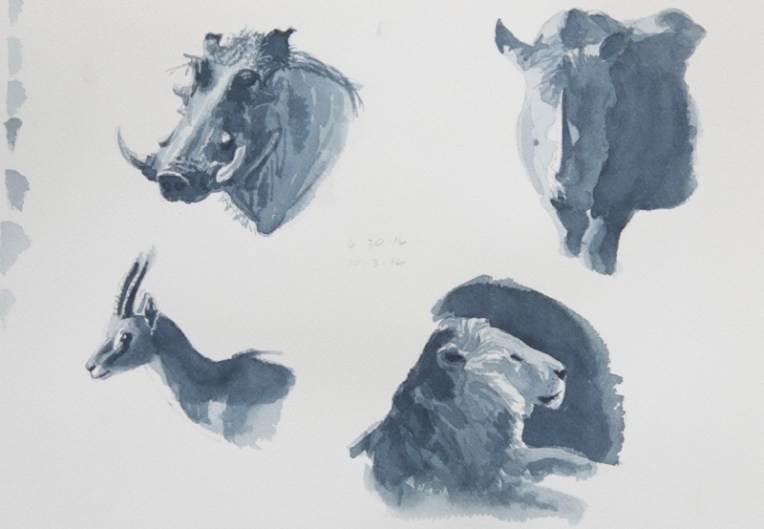
I’ve been very taken with the Pentalic Nature Sketchbooks. They seem to handle a variety of dry and “damp” media well. However, the paper is thinner in the newer sketchbooks from when I originally started to buy them (even though they still say 130lb. on the cover), but the Graphitone did act more like watercolor when wetted than on some of the other papers.

strathmore-400-1

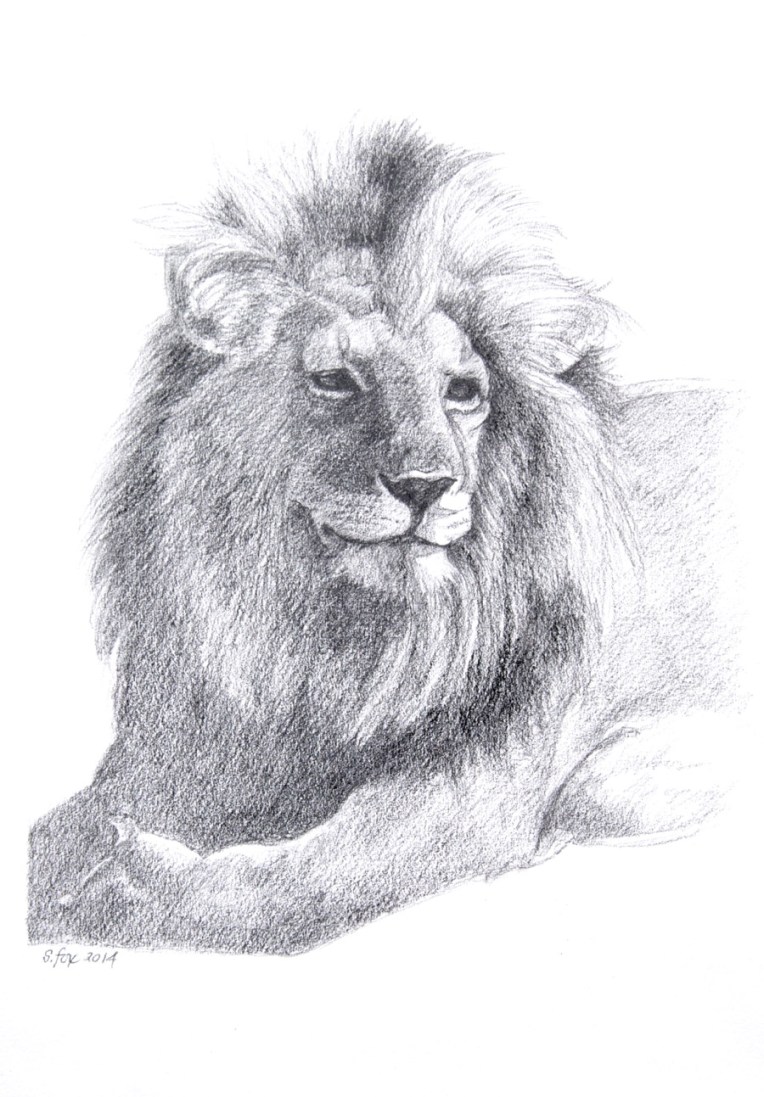
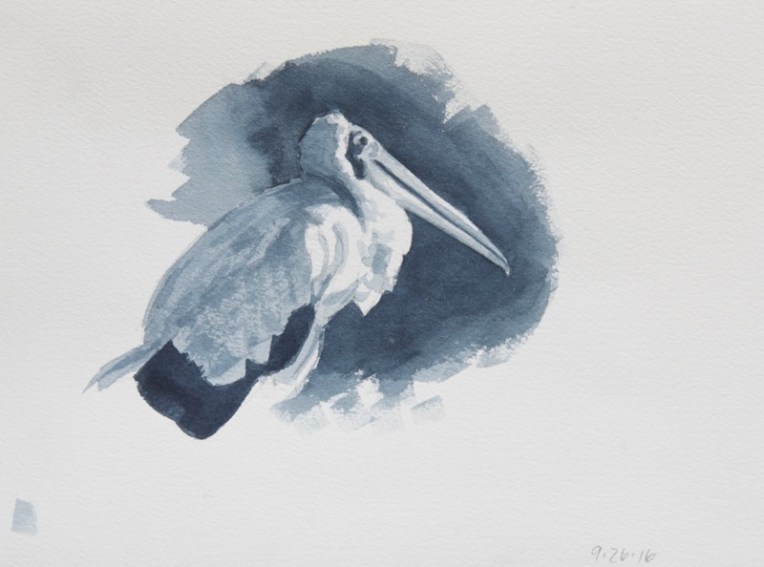
Finally, for this portrait head I used an off-white Strathmore 400 vellum bristol, which had also lived near the bottom of the paper drawer for many years. I like the way the media worked on this paper the best. It’s probably 3-ply which means it can take a fair amount of water. But paper formulas change over the years, not usually for the better, so I’ll be buying some to see how well it works today. Fingers crossed.

The other papers I test drove included: Rives BFK (my favorite for dry graphite drawings), Sennelier Album Carte d’Art, Rising (plate finish), a Canson drawing paper, Aquabee Super Deluxe (a great example of a paper that has been ruined by cheapening and thinning over the years as the company has changed hands), Crescent cold press illustration board and, finally, Daler Cartridge Paper. The watercolor paper was Lanaquarelle hot press.

Looks like we’re going to have rainy weather for the next week or so up here Behind the Redwood Curtain,  perfect for continuing my explorations. Family coming up next week for Thanksgiving, so see you in a couple of weeks. Have a great holiday!

For Veteran’s Day…A Bit Of History And A Tribute

wall-and-gis
American GIs look over the hastily put up Wall

My husband joined the Air Force when he was seventeen. After training he was assigned to the Air Force Security Service and posted to Berlin six months after the Wall went up in 1962 (and if I tell you any more I’ll have to kill you). At first he worked at Templehof, the obscenely-scaled airport designed by Albert Speer. The building was wired with high explosives. If, as the saying went at the time, the flag went up, meaning the Soviets had invaded, then they had less than 30 minutes to destroy what needed to be destroyed and get out. They didn’t actually expect to survive. Later he was at the Marienfelde Operations Site at the southern edge of the city. He served his hitch and came back in one piece.

While he was there he had time to wander about West Berlin, sometimes taking photos. He’s given me permission to share some, which I appreciate since it gives me a chance to honor his service to our country. He has an enlargement of the one at the top in his office. I call it “the Life magazine cover shot”.

The wall went up very fast and sloppy at first, which is what you see in the photos, and was later replaced with the taller, permanent one (so the Russians thought at the time) that we brought home pieces of when we were in Berlin two months after reunification in 1990 (we got together in 1983). He got to see all the familiar sights fr0m his time there and I saw them for the first time. Checkpoint Charlie was gone and there was already a United Colors of Benneton store on the corner on the east side. We drove south of the city and David saw Berlin from that direction for the first time. I did a blog post about that trip with photos I took. You can read it here.

But here’s what it was like in 1962 (photos were scanned but were not processed or retouched):

wall-and-trees
The Wall cut right across the city
tribute-flowers
Tributes for those who died trying to cross to freedom
sign
Berlin was a divided city. There were American, French and British sectors on the western side. The east was part of the Orwellian-named German Democratic Republic
trees-and-wall3
View into East Berlin. Bombed out building on the right, unrepaired since the end of WWII
american-sector
The Brandenburg Gate

Watercolors From My 2016 Mongolia Trip

delger-camp-horse
A local herder came by the ger camp I was staying at to help put up more gers and “parked” his horse right in front of mine. The horses are stoic about standing like this for hours at a time. He shifted around over the two hours I spent on this piece but always came back to this position. I had never done a watercolor of a live animal before, but he was a good model and once I got the drawing and shadow shapes down it was fun

The weather on this last trip often wasn’t conducive to sitting and painting since a watercolor can easily take an hour or more. We had snow, rain and wind on the Expedition. It was hot at Ikh Nart and rainy at Delger Camp. I mostly drew in my journal and I’ll share those with you next week. But I did get some watercolor time in and here’s the result…

great-gobi-a
This was our view from camp across an open plain when we were in the Great Gob A Strictly Protected Area. It was really hot so I sat in the shade of our dining tent
stupas-erdenesogt
I was able to break free for a hour or two when we were visiting the Gachen Lama Monastery in Erdenesogt Soum after we came back north from the Gobi. It’s located in the central Hangai Mountains and is a totally different ecosystem. I’ve always loved seeing the stupas which overlook the river valley
ikh-nart
As described in a previous post, I had purchased my own ger and lived in it for a week at Ikh Nartiin Chuluu Nature Reserve. These are some of the rock formations that I could see from nearby
hogno-han-nr
My last stop was Delger Camp in the Hogno Han Nature Reserve. I had arranged to be dropped off in the wetland/dune area to paint and decided to start with the clouds moving over the mountains of the reserve. They kept getting closer and closer and the wind started to come up. It started to rain and I took cover under a tree. As the front moved over me there were loud rumbles of thunder. Fortunately the driver, who is the brother-in-law of the camp owner, had left a mobile phone with me, a first and something I’ve never worried about having since there’s usually no service in areas like this. I called and managed to get through to the camp owner who had the driver, who’d gone into the soum center for gas and was too far east to have seen the storm moving in, come back and get me as quickly as possible. Other than getting wet, I was fine. It was the end of my painting day, but I do have this not-quite-finished one as a memory.

12 Things You Need To Know To Be A Good (Or Better) Artist

me-at-erdenesogt
On location at Erdenesogt, Mongolia, 2016

I can’t remember a time when I didn’t draw. I’ve had the good fortune to been able to work in art-related fields all my adult life, first as a sign painter and graphic designer starting when I was 22 years old, then as an illustrator and finally, since 1997, a fine artist painting in oil and specializing in animals. I’ve learned a few  things over the years, both from experience and from other artists, and would like to pass them on to you.

leo
I always drew animals, sometimes copying them from Walter T. Foster art instruction books, which I still have. I think I was around ten when I did this lion.

1.  Painting is drawing, in the sense of making marks on a surface with conscious intent, whether you’re a representational or abstract artist. Develop that intentionality.

2. You have to gain competence in: design/composition, drawing, value, color and edges. If you can afford it, buy Richard Schmid’s book “All I Know About Painting” or google each topic.

3-cheetahs
I always seemed to have a knack for whimsical animals. I don’t feel that I was born with any particular artistic gift, just the drive to draw, but somehow animals came easily, including eye expression. It just happens. This is a mixed media piece I did after I went back to art school and got an illustration degree in 1989.

3. It’s not about detail or fidelity to a photograph as the one true criteria for the quality of a work of art. It’s about expressing your personal artistic vision however that manifests. Don’t do detail because you never learned to edit. Learn to simplify. Which is actually pretty hard, but will liberate you in ways you can’t imagine. Don’t use photos unless you know how to compensate for the way they flatten and distort. It’s obvious to an educated eye when an artist has accepted a photo as truth and simply reproduced it, faults and all.

4.  Learn from the best, but find your own path. As they told us in art school, be the best you you can be, not a second-rate someone else.

local-landscape
I’ve taken quite a few plein air workshops over the years even though I’m a studio painter. It’s good to get out in the fresh air and paint from life, enjoying the process and not worrying about the result. So it’s a busman’s holiday for me. No pressure.

5. Never be afraid to reevaluate your approach and process, scary as that might be. Some artists cling to how they work like it’s a life preserver without which they’d drown. Find a way to let go of that. The risk isn’t as big as you think it is.

6. There are no mistakes, only “what’s next?” This is from my oil painting teacher who I studied with privately for over two years. It got me off that big “OMG I’m going to RUIN IT!” hook.

dsc_1985
My process has changed over the years and will continue to in the future. I now almost always do a finished drawing of my subject. I used to wing it on the canvas and that got me into a lot of trouble sometimes, with the work suffering from trying to solve problems as I painted, which kept me from focusing on my brushwork and other aspects of the finish. Much better to have made that correction of the head and neck on the drawing than on the painting. The farther in you are when you see a mistake the harder it is to make yourself wipe it off and fix it. But fix it you must.

7.Plan for “downtime” each year to recharge your creative batteries. Don’t do any art or try a new media/paper/style. It’s a chance to grow with no risk.

8. Keep a sketchbook. Use it. Consider doing a drawing a day for a week, a month, a year. Have fun. Try lots of different pencils and pens. Do them fast. Set a timer for a minute, five minutes, etc. Sketch an egg, a glass of water, an egg in a glass of water, your dog or cat, whatever you want. Look into learning contour drawing. A little tricky to get the hang of  but lots of fun once you do. Hone those motor skills to keep them fresh and available.

a-good-stretch
And the preliminary drawings pay off in the finished work . This painting “A Good Stretch” was accepted into the 2015 Society of Animal Artists international juried exhibition “Art and the Animal”.

9. Gain a basic familiarity with the history of art. Who knows what inspiration you may find. I used to pick a new poet a month to check out. Google around and pick a new artist every month to learn about. Go back to the beginning and be humbled by cave paintings.

10. Don’t be too satisfied with your work or too hard on yourself. Find a balance and keep moving forward.

sheep-near-stonehenge
Location sketch done during a trip to England in 2015. It probably took about five minutes.

11. Seek out and listen to competent criticism of your work. Access to another artist’s educated eye and input is invaluable. Damp down that little voice that says “Yes, but…”

12. If the only thing that will make you truly happy in life is to create art, do not let anyone discourage you. Ever.

img_0127
I mess about with a variety of media just for fun. This frog was done on my iPad.

Sketching At The Santa Barbara Zoo

sb-1

I returned home on Monday from attending the Explorers Club Lowell Thomas Annual Dinner in Santa Barbara, California. I spent a productive afternoon the day before the Saturday event sketching at the Santa Barbara Zoo, keeping it really simple: a 7×5″ Pentalic Nature Sketchbook and a Sakura Micron .01 black pen.

Sketching live animals can be quite challenging and is great exercise for one’s visual memory. None of these took more than about five minutes. Sometimes I only did the contour and filled in the bodies a bit later, like with the condors above. I did take photos but learned long ago that drawing animals is a very different experience than shooting photos in that you have to really LOOK and SEE to get anything down. In the end it’s as much about process as result, but I’m pretty happy with these.

sb-2sb-3sb-4

sb-5

Gray Studies=Fun In The Studio

gs-stork

I’m back home after my Wyoming trip with no big juried show deadlines to paint for, so it’s my time of year to work on my painting process, in which I review the work I did over the last year thinking about what worked and what didn’t, what I might want to do in the coming year and how. I’m also going back to basics in a couple of areas to improve my skill set. One of those areas is contour drawing. I shared some of the those from the SKB workshop in last week’s post. Another is value studies or, as David Rankin, the nationally-known watercolorist who I studied with at the workshop, calls them, Gray Studies. You can find a number of his excellent tutorials on his Facebook page here and on his website here. (Go to “Watercolor Training Files” on the left hand side and then “Grey Studies Training Files”.

I spent quite a bit of time one afternoon at the workshop simply figuring out, with his help, how to put down a correct single tone watercolor wash (the *secret* is plenty of water) using a 1″ flat brush (I usually use rounds). The really important exercise was learning his four value “recipe” for doing gray studies by painting along with him as he did one.

Once back home in the studio I wanted to build on what I’d learned. I’ve done value studies as a preliminary step for my paintings for years and it was something I’d learned in art school. I’d done them as graphite drawings or very small oils and it always felt a bit time consuming, however necessary. But this way of doing them in watercolor was an eye-opener. So easy, really. Paint around the whites, covering everything else. Then add layers of middle values. Save the darkest dark, if there is one, for last. But it took some new thinking and seeing to be able to do it and know what I was doing.

So I’ve spent most of the week painting gray studies from my photo reference. It was fun to revisit some of my Kenya wildlife images. These are all in Payne’s Gray (which has a very nice blueish tone) on an Arches 140lb cold press watercolor block, using sometimes a flat and sometimes a round. None took more than an hour or so. The stork above was the second one. In order:

gs-bison

gs-hippo-buff-hyena

gs-warthog-rhino-gazelle-lion

At this point I felt that I understood the process enough to paint some that might become finished oils.

gs-sparrow-vulture-horse-camel

gs-horses

I did the quick preliminary drawings with a 9B Cretacolor Monolith pencil. It’s important not to labor over them, just indicate the basic shapes, plus where the white  of the paper will be. So there you have it…a quick and inexpensive way to try out art ideas and value patterns.