Header image for SketchWild. All images and the logotype by Susan Fox
Here at Fox Studio I share mostly my studio fine art, stories of my travels and interesting things going on on our rural acre’s garden, pond, etc. A few years ago I decided to set up a new site devoted to nature sketching in general and pen and ink drawing in particular, including tutorial posts on that media and what I’ve learned about various nibs, ink, etc.
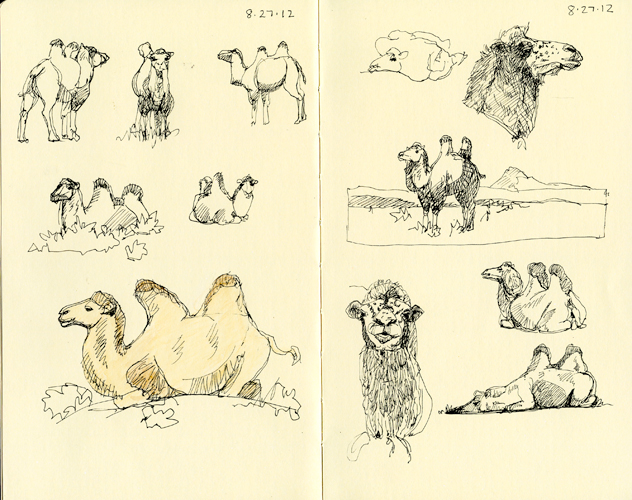
Camels I sketched at a tourist ger camp in 2012.
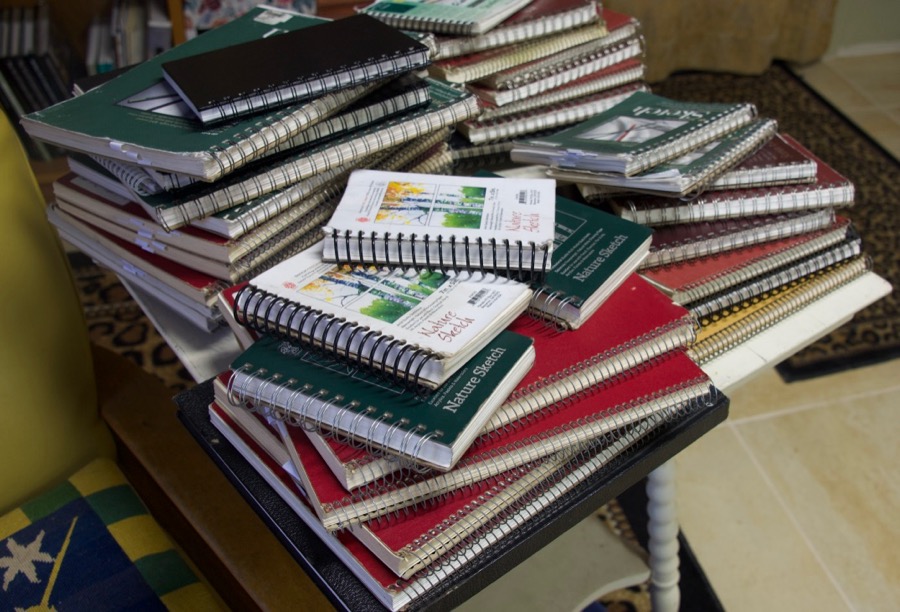
Sketch books
I’ve carried a sketchbook with me on my travels since 1989. I’ve scanned over half of them now and use examples from them to demonstrate points I’m making about nature sketching.
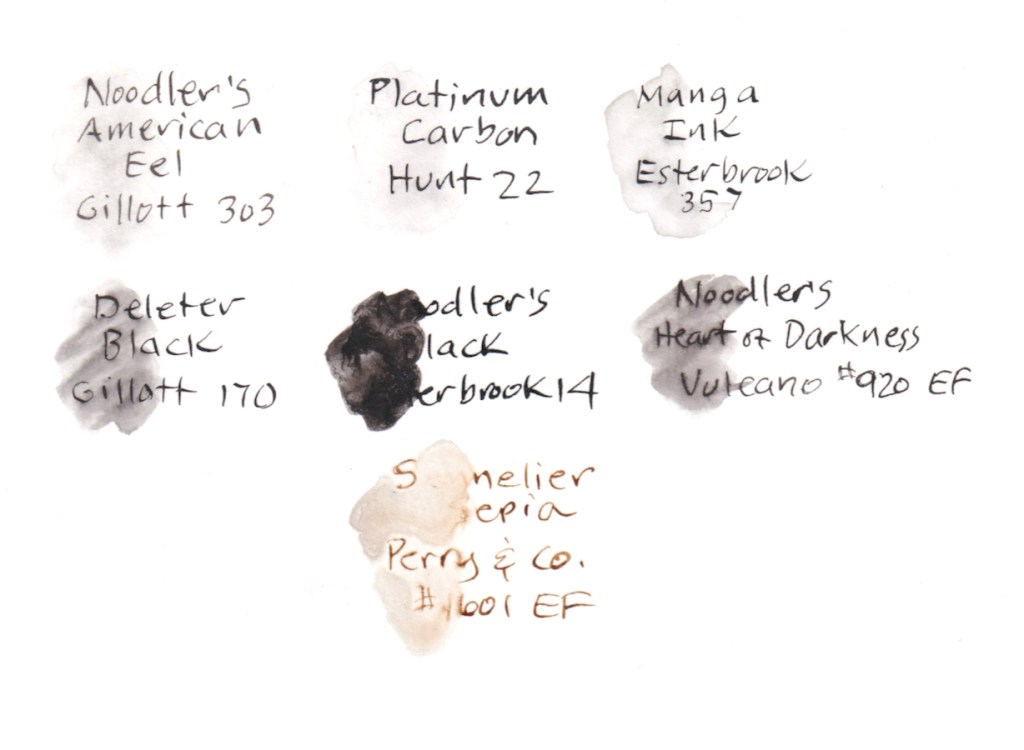
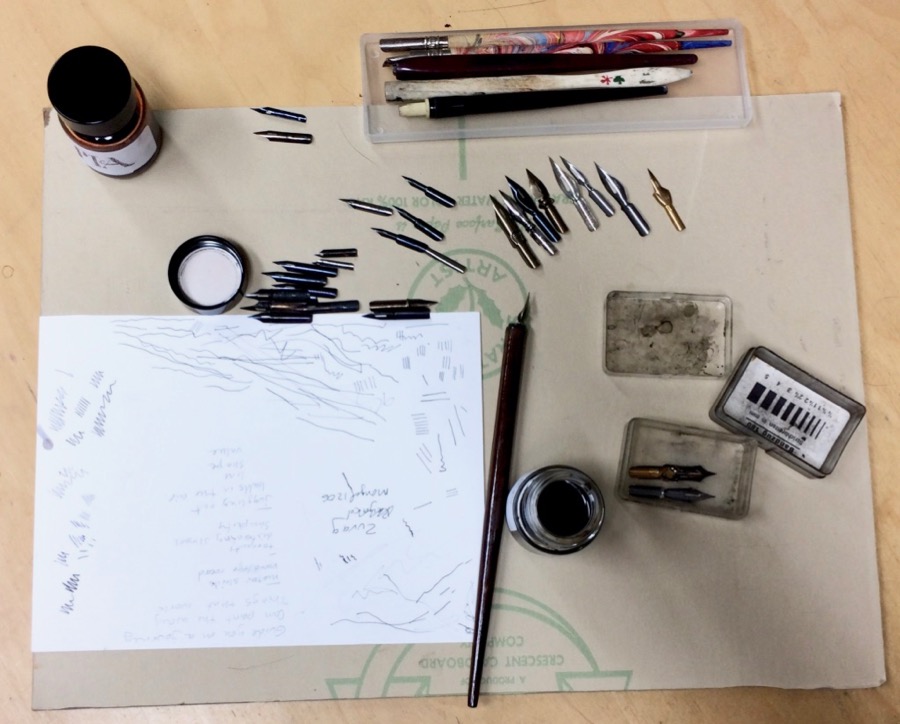
Ink test
I also report on the results of my various tests of nibs, inks and more. In the example above I was testing for water resistence/waterproofness. As you can see there’s great variation.
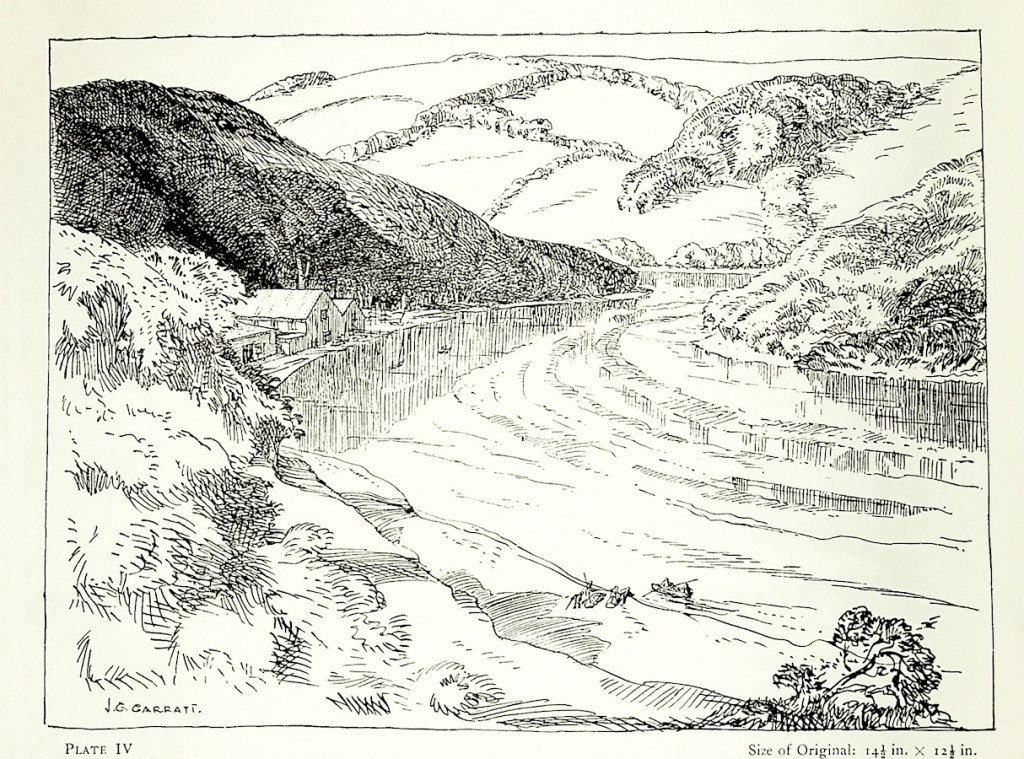
Location pen and ink drawing by J. Geoffrey Garrett
One of my goals is to share the art and stories of pen and ink artists of the past through my “Great Pen and Ink Artists” series, which started with Charles Dana Gibson of Gibson Girl fame. I’ve also unearthed quite a few pen and ink artists of the past who are pretty much forgotten now but who wrote excellent books on how to use this classic art media and I’ll be doing posts in the future on them. J. Geoffrey Garrett is one of them. There’s next to no information about him, not even a Wikipedia entry. He seems to have worked entirely or mostly on location in his home country of England. So that’s an overview of what’s on tap at SketchWild, which you can findhere. I’m also selling sets of pen nibs selected specifically for artists at my Fox Studio Etsy shop, which is here. I’m also offering original art in pen and ink, oil and pen and ink/colored pencil, a downloadable tutorial “A Beginner’s Guide to Sketching” and downloadable coloring pages.
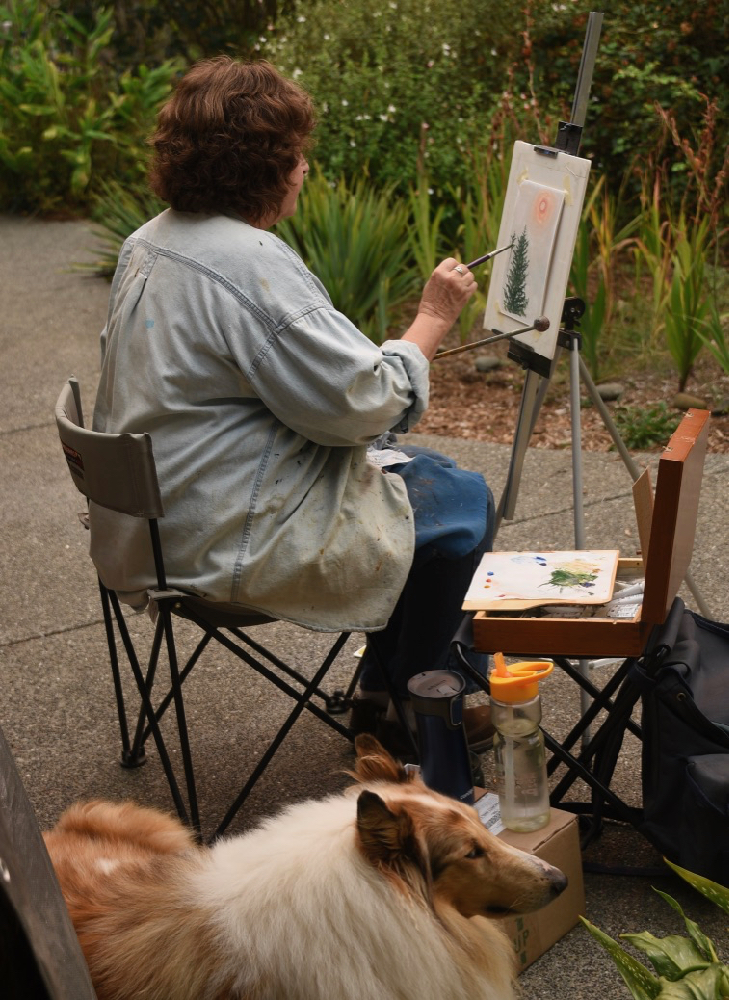
On “location’ at home the first day of the Humboldt Paintout with Peregrin
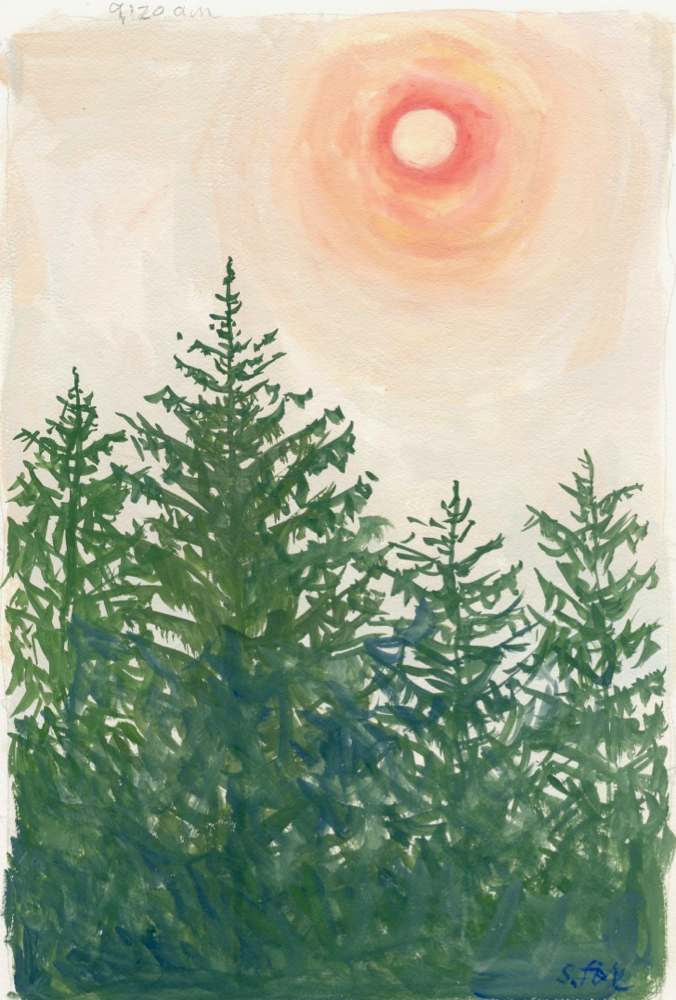
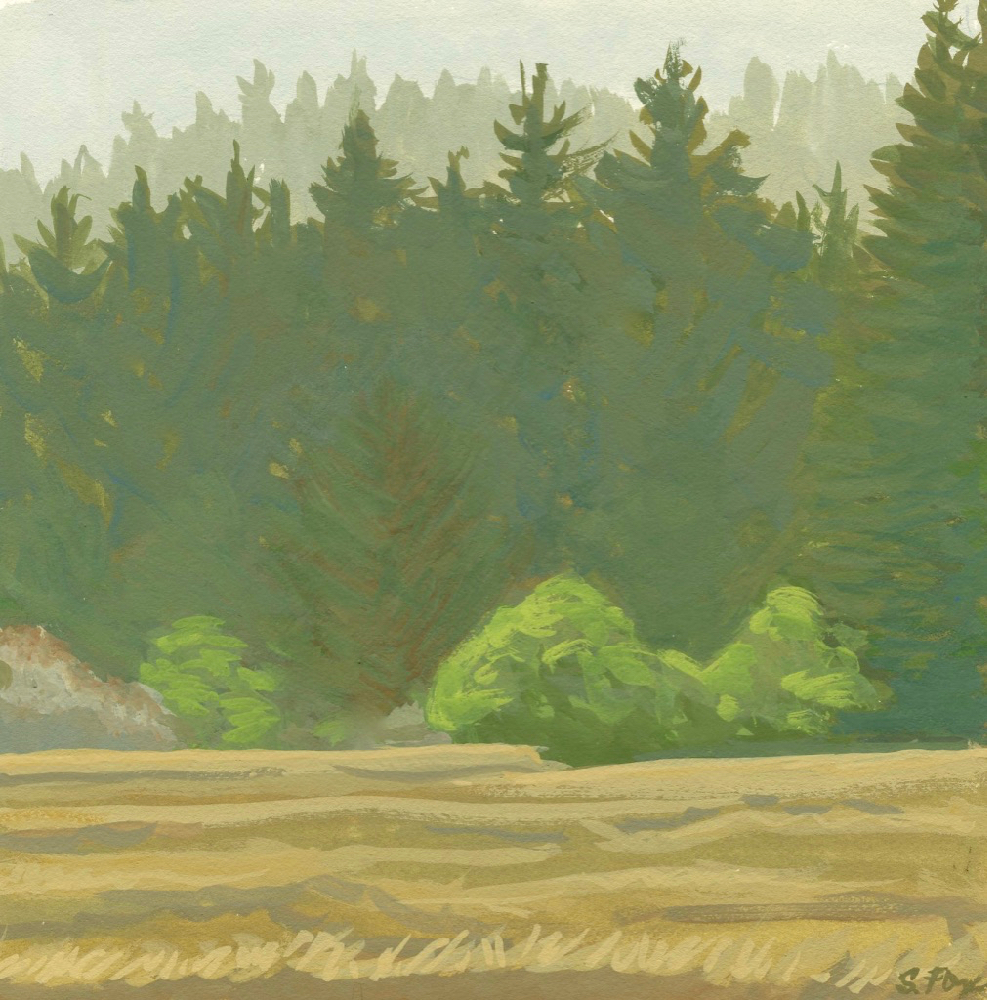
Most art shows have gone virtual due to Covid-19 but they’re still happening! I recently rejoined our local Redwood Art Association in time to enter the 2nd annual Humboldt Paint Out with was held from September 29- October 3, Monday through Saturday. The sticky part was that, due to a wildfire to the east of us it was smoky for the entire time (three out of four weeks total). Time to “make lemonade”. I was intending to head out and see what, if anything, I could find as a subject but saw the sun rising above the evergreens to the east of us and decided I’d try to capture that. Grabbed my painting gear walked three feet from my studio, set up and got to it. I had already decided to paint in gouache (opaque watercolor) which I’ve used on and off for decades. Here’s the result:
“Smoke Light”
That same day I painted “Smoke” from the same spot trying to capture the visual texture and color of it. So instead of just photos I have some of it recorded in paint.
“Smoke”
The next few days were really bad and we didn’t want to be outside at all unless absolutely necessary. But Friday, Oct. 2, rolled around and I decided to hit the road and head north. My original idea had been to do one painting at each of the lagoons- Dry Lagoon, Big Lagoon, Freshwater Lagoon, Stone Lagoon and I hoped that maybe some or all of them, being right by the ocean, might be clear enough to be ok. Alas, it wasn’t smoke but heavy fog that put paid to that idea. I’d also wanted to paint at Prairie Creek State Park, which is also part of Redwood National Park, so I went on north with fingers crossed. And when I got to Orick, not far to the south, SUNSHINE! And, although it was hazy, it the air was ok enough to set up and paint a scene of the namesake prairie. I’d taken one of our collies, Hailey, with me and she happily settled down at the base of my easel for the duration. In fact, she got a little stubborn when it was time to leave.
“Hazy Morning, Prairie Creek”
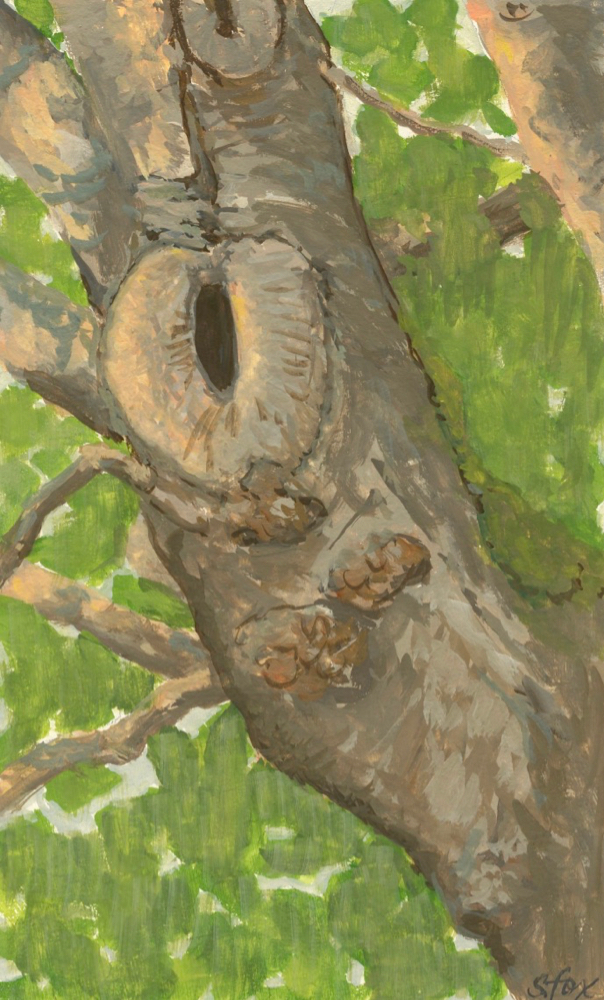
By the time I was done the smoke was starting to thicken so home I went back into fog and smoke. At this point I decided to stay home and finish up the event at our house and in our own neighborhood. When we bought the acre we built our house on there were almost no trees left from when the previous owner had it logged. But there was one special tree, a very old alder. I created the basic floor plan for our house and put the window over the sink such that it framed it. It was challenging to paint in the shifting smoke light but I finally felt I’d captured it. I’d been wanting to do this big old bole for years and had only managed a couple of sketches. I did it in the afternoon after I got returned.
“Our Old Alder, Smoke Light”
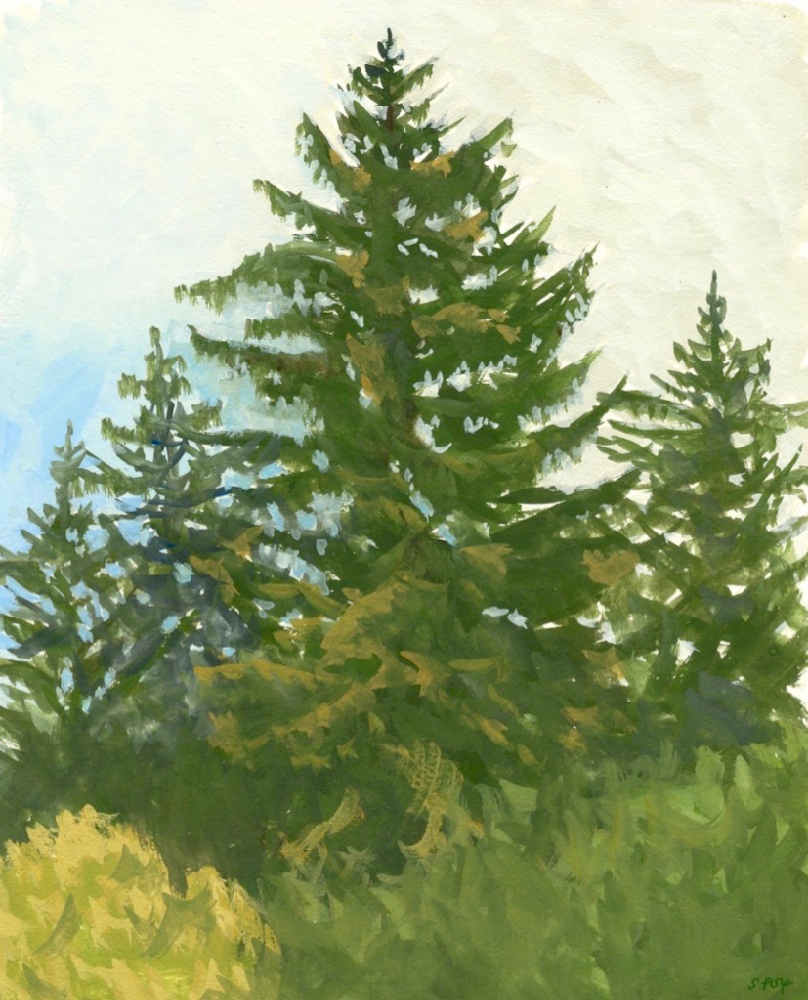
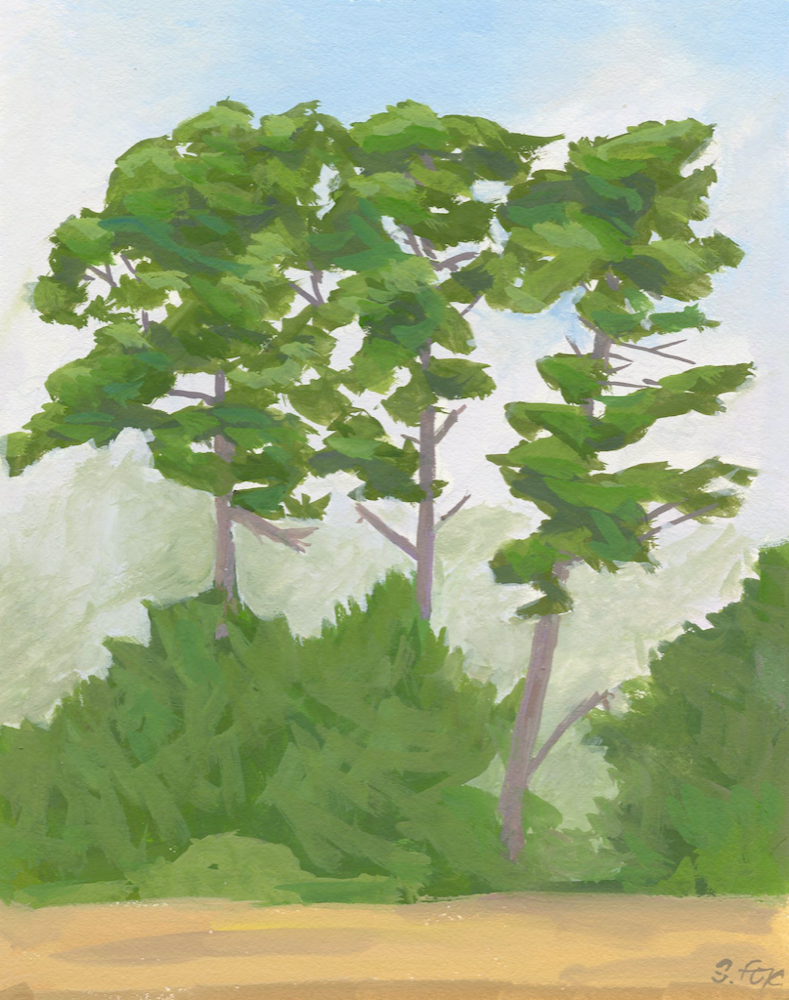
One more day to go and, of course, it was smoky at first. On the road one takes before turning onto our street one of the properties to the north has a few very tall old pine trees, probably what’s left from a windbreak. After lunch the wind must have changed because suddenly we had clear blue skies! So I loaded up my painting gear and drove the whole couple of minutes or so to the corner where I could set up under some very old cypress trees. I work pretty fast. One of the things I like about gouache is that it dries fast so one layer colors quickly. Which was good because I had about ten minutes to go and back came the smoke. I’d taken photos when I gotten there so was able to get the last bits done in the studio (which is NOT cheating). I did have fun playing with color temperature.
“Neighborhood Pines”
On deadline day, Saturday the third, I scanned all of them, made necessary adjustments so they would be as accurate as possible and submitted them. And then waited, as we do when entering shows. The juror was Randall Sexton, a very accomplished artist who lives in the San Francisco Bay Area. Since I’m not really a plein painter like those who do it as their main art activity I didn’t think much about getting an award. For me it was more about getting involved again in the local art scene and getting started doing location work in gouache. But…to my surprise and pleasure “Our Old Alder, Smoke Light” took 5th place! The reward was a check for $200, a $100 gift certificate from our local frame shop and another gift certificate from a local spa for a massage! I loved that the judge liked the one that is the most special to me.
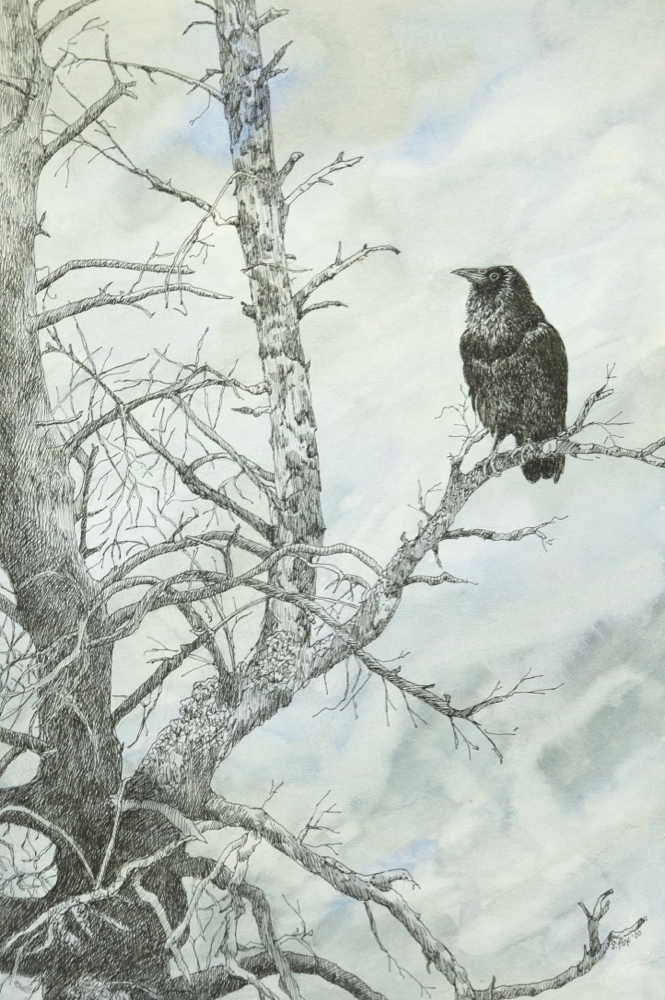
And wait, there’s more! I also enter the RAA’s “Halloween” show. Once again I used it as a springboard to try out something new, a combination of pen and ink and watercolor. Once again my purpose was to have fun participating. Scott W. Prior, nationally known painter, was the juror and he picked “Quoth, The Raven” for an Award of Merit”!
“Quoth, The Raven” pen and ink, watercolor on hot press illustration board
So that’s what I’ve been up to for the last month or so. I’m currently working on a set of three oil paintings for a Nov. 13 deadline. In my last post I showed the value and color studies for them. I’ll post a full step by step when they’re done.
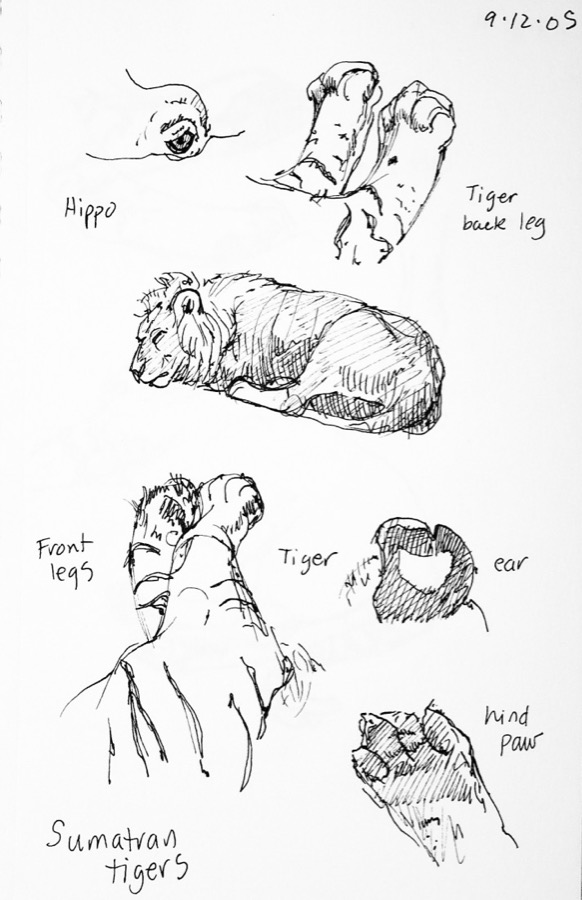
Once upon a time (back in the mid 1970s), when I first had professional art aspirations, my first media was pen and ink, heavily influenced by medieval illumination and Alphonse Mucha. I used them for many years when I was a freelance graphic designer. In the early 1990s, after getting a BFA Illustration from the Academy of Art (then) College, I was able to realize a childhood dream and spent two years in private study with a local artist learning to paint in oil. And since 1997, that’s what I’ve pursued professionally. But I never quite let go of pen and ink, using it for sketching on my travels. Everything from sketching animals…
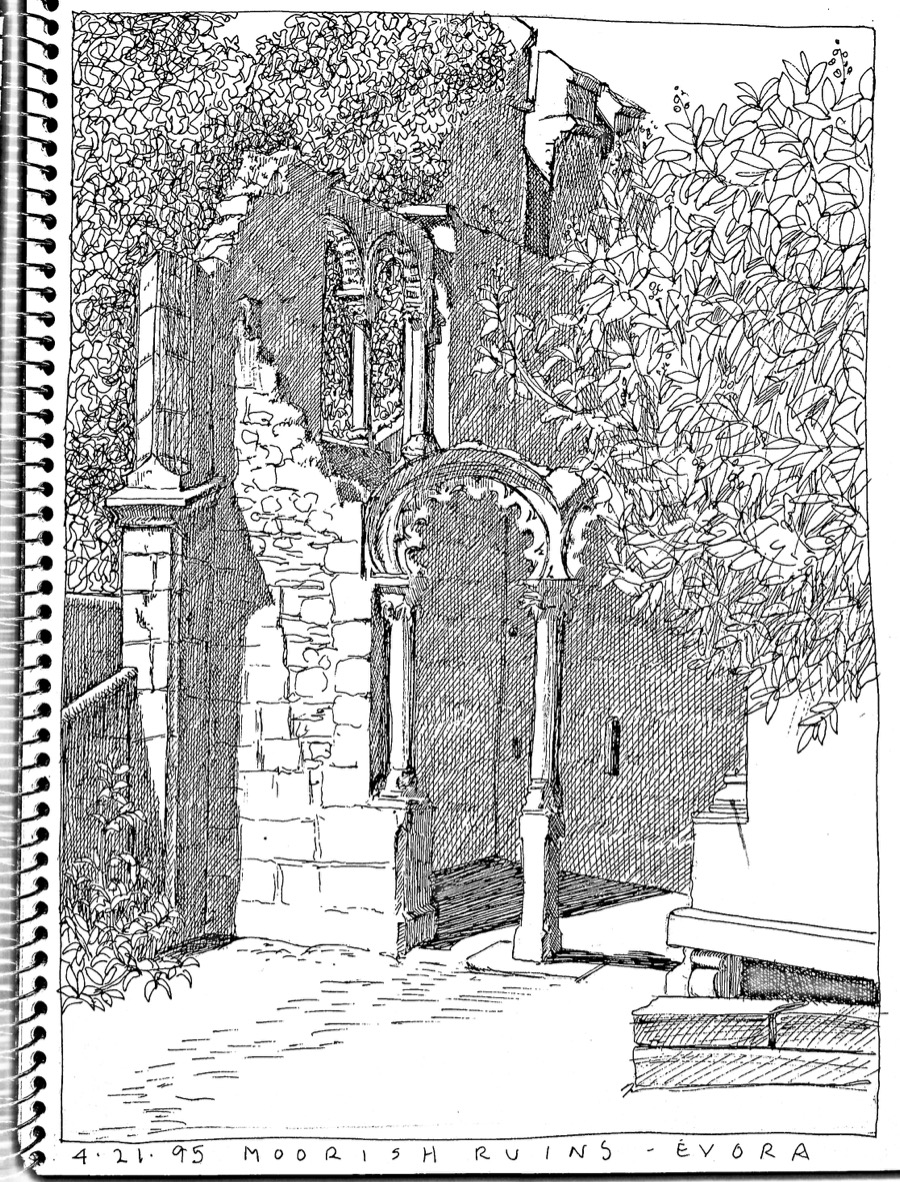
…to spending a morning drawing these ruins I saw in Evora, Portugal.
The revival of location sketching with the urban sketchers movement and more has inspired me to return to my roots. I’ve been using Sakura Micron pens for years for my Mongolia journals, both for writing and sketching, along with other trips, but had become increasingly irritated with them. They don’t seem to hold a consistent tip anymore, which means I can’t trust them. I did some research and finally settled on what now appears to the the high quality standard, Copic Multiliners, and bought a full set of them. But…dip pens still beckoned. They have a feel and make a line that can’t be created any other way. So for a year now I’ve been building a collection of nibs via Etsy and eBay and, using Jet Pens excellent reviews, buying a half dozen different bottles of ink, experimenting a bit between my painting work. But can I use them in the field without making an unholy mess? Well, late 19th and early 20th century artists like Joseph Pennell, Henry Pitz, Earnest Watson, Arthur Guptill and William Robinson Leigh did it. And that led me to the wonderful world of inkwells, including ones made specifically for traveling. I’ll be doing an inkwell post in the future, along with discussions of nibs, ink and paper. Once my SketchWild site launches I’ll be offering dip pen drawing instruction. If you think you’d be interested in that let me know in the comments. Over the past month or so I’ve been “test driving” nibs while also trying out possible painting subjects. Of of yesterday, here’s what I’ve done:
I was treated to an EXTREMELY rare sighting of wild bactrian camels, a herd of sixteen or so, heading south in the Gobi in 2016. They crossed the road in front us and were a long way off, but my photos were good enough to do these little movement studies, freehand with no pencil underdrawing. I used a Hunt 100 Artist nib and Platinum Carbon ink on Strathmore 300 vellum bristol, a 12×9″ pad. All of the drawings in this post were done on that paper.I was considering entering a juried show that required corvids as the subject. I ultimately decided not to enter but did have fun trying out possible subjects with my dip pens, once again directly with no pencil underdrawing. I’ve had fun getting nibs from a variety of countries including Italy, France and England. Even some from the era of the Soviet Union with a hammer and sickle on them, purchased through Etsy from someone who lives in Ukraine! And they’re a really nice nib! The subject here is takhi/Przewalski’s horse, all photographed in Mongolia. This sheet really shows how different the various nibs are. Hunt 100 Artist/Platinum Carbon ink; Gillott #290/Platinum Carbom ink; Gillott #170/Platinum Carbon ink; Gillott #303 EF/Noodler’s Black ink; Gillott #404/ Perle Noir ink; Esterbrook 356 Art & Drafting/Diamonte Jet Black ink
Contining on: All done with Higgins Fountain Pen India Ink. Hunt #102 crowquill; Hunt #108 crowquill; Gillott #659 crowquill; Esterbrook #48 Falcon; Hunt #100 Artist (new); Gillott #293 Public Pen; Hunt #103 Mapping; Hunt #100 Artist (new); Hunt #100 (vintage)
Over the last couple of days I’ve done a series of small drawings on the Strathmore 300 vellum bristol. This time, unlike the ones above, I did do a light preliminary pencil sketch. They took maybe an hour and change at most. The purpose was to explore how each nib feels when used for an actual drawing. All of them have things I like about them but I found I really did like the Gillott #303 Extra Fine quite a lot.
Race horse-Hunt #100 (new)Domestic bactrian camel-Gillott #303 Extra FineDomestic Mongol horse-Gillott #170
On the ones above I added the background shape both to pop out the white of the light sides of the animals and to see how filling in an area would work with that particular nib. All were ok, but want to experiment more.
Siberian ibex-Gillott #29Pika-Hunt #102 crowquill; not thrilled with how the fur came out but that’s why it’s good to experiment
And the Copic pens? Love, love, love them. I’ve joined artist Cathy Johnson’s “Sketch With Me!” Facebook group. She does virtual events one weekend a month. This is what I posted in October, an arrangement of squash from our garden. Copic pen and watercolor in a Stillman and Birn Zeta series wirebound sketchbook.
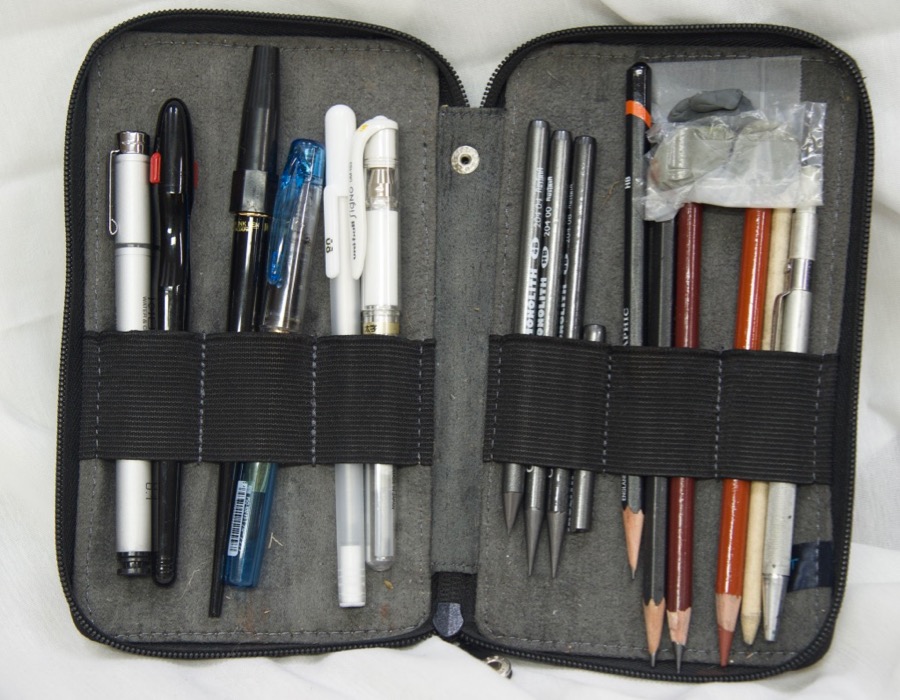
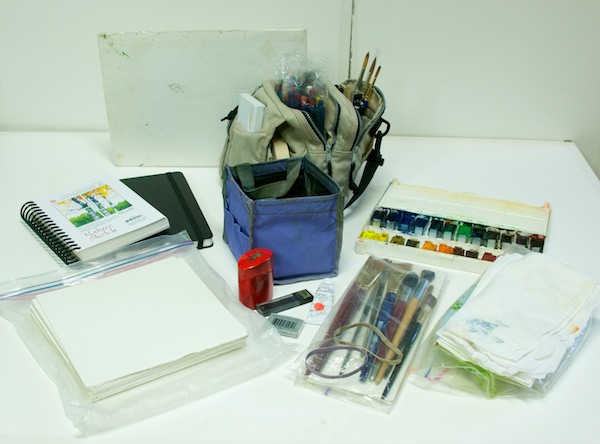
Most of you know me as an oil painter, but I’ve always loved to sketchand draw with pencils and pens and I also paint in watercolor on location. Dating back to 1989, I take at least a small sketchbook and kit like the one above with me when I travel.
I’ve enjoyed seeing sketching take-off as an international art phenomenon and I’ve decided to formally throw my well-loved field hat into the ring. Before the end of the month I’ll be debuting a new website dedicated to sketching called “SketchWild”. It will include not only my field and travel sketching and painting, but also art supply reviews, tutorials and online classes. Tell me in the comments what you’d like to learn!
My specialty and favorite subject has always been animals. I seem to be one of a surprisingly small number of artists who draw and paint from live animals and I’ll offering tutorials on how you can do that, too.
If you’ve never sketched before and want to try it but don’t know where to start or if you’re a landscape painter who occasionally wants to add animals like, say, a cow or horse, to your painting but don’t know how to draw them, I’ll be offering classes and/or sets of tutorials for both. I’ll also be offering instruction in pen and ink sketching/drawing with technical pens, fountain pens and dip pens regardless of subject and tutorials on sketching with an iPad, including a review of the variety of apps available. And there are a lot of them!
In the end it’s not about, or only about, making finished pretty pictures, but enjoying the process and seeing the world through art you’ve created yourself. Some of the best souvenirs you can take home are the sketches you did of what caught your eye.
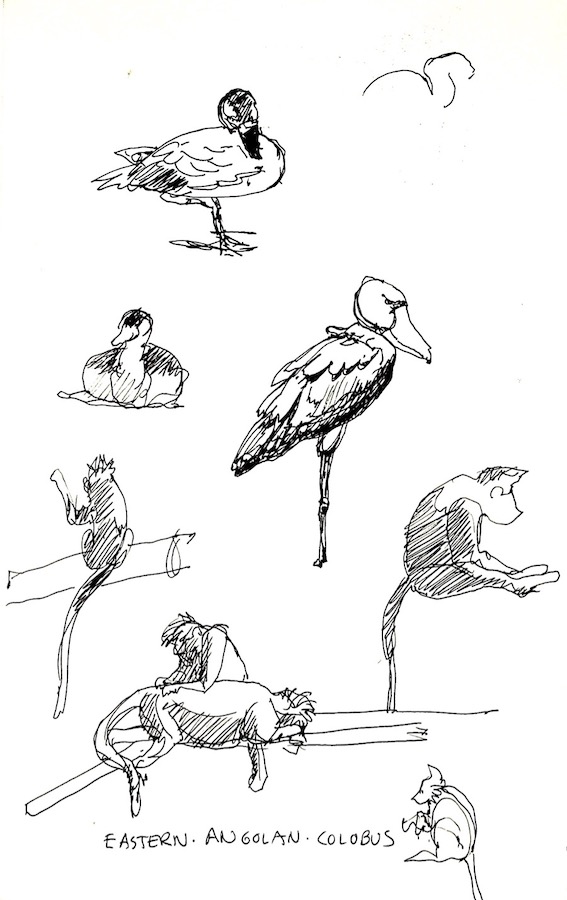
To give you an idea of what I’ve done over the years, here’s a selection from my sketchbooks. Some, like the animals were done very quickly, in maybe one to three minutes, sometimes less. The landscapes hold still so I can spend more time on them. And if I can add an animal, so much the better!
Rolling Hills Wildlife Experience, 2010
Monkeys don’t hold still for long so you have to work fast and see the basic shapes, in this case a quick indication of light and shadow to go with the drawing.
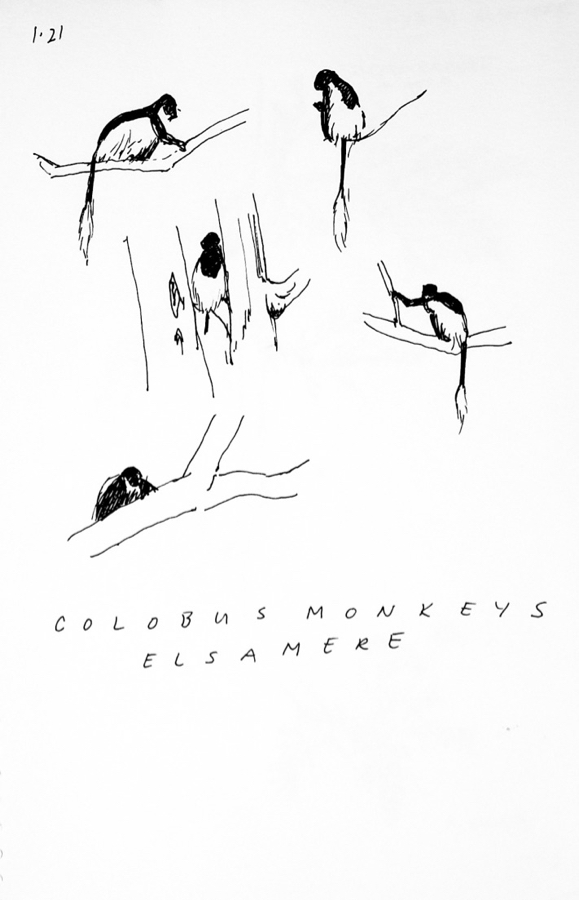
Colobus monkeys, Elsamere, Kenya, 1999
These colobus monkeys were fairly far up in the trees and jumping around so I simply and quickly sketched in the black bodies, leaving the white feathering the color of the paper.
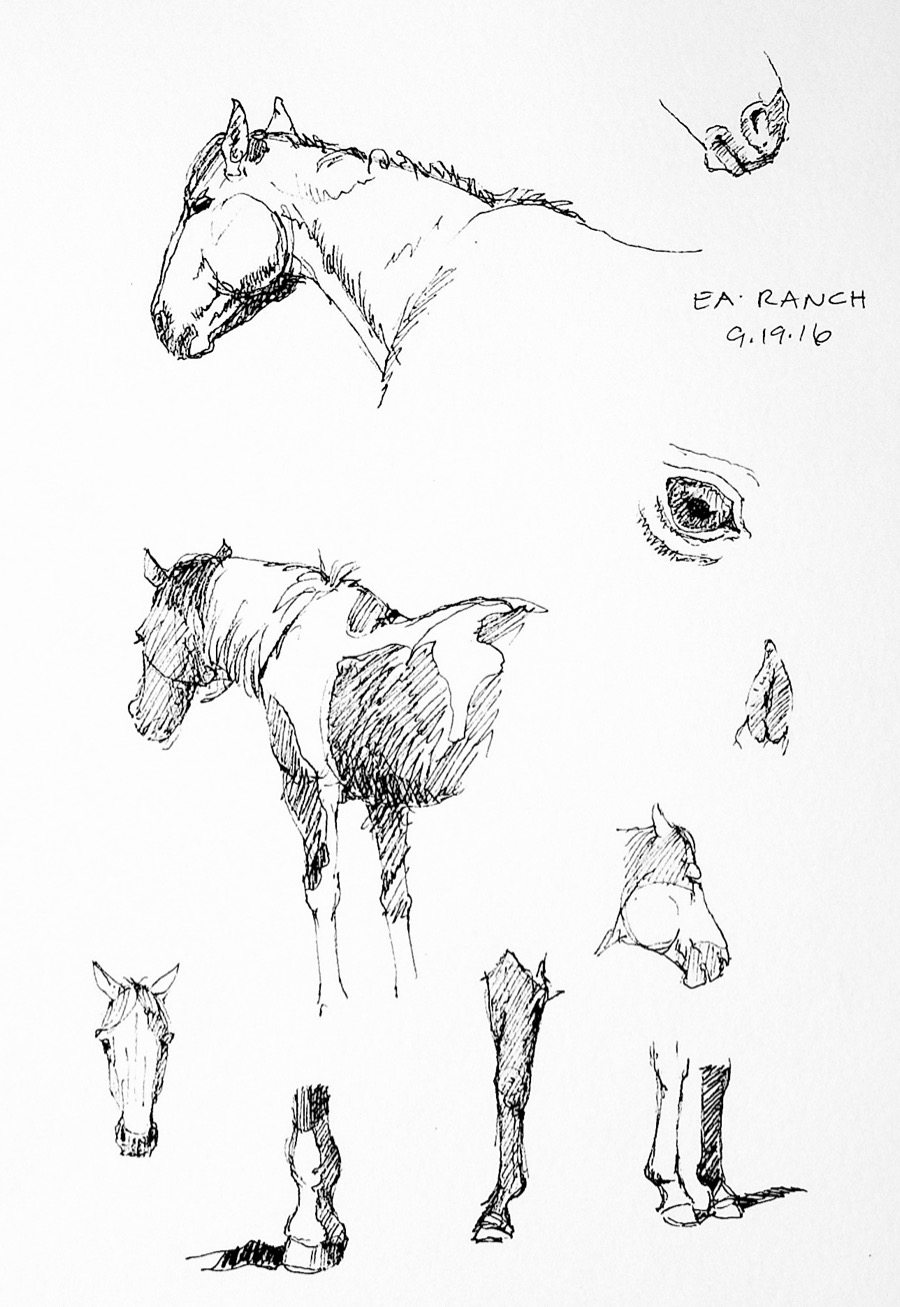
Horses, EA Ranch, Wyoming, 2014
The horses were in a corral standing around, so I had time to add things like the pinto markings and do eye, leg and hoof studies.
I was sitting up on the rocky hillside of a valley in the reserve when I did these quick sketches of the world’s largest mountain sheep. I’ve seen them many times and have painted them, so I “know what they look like”.
Berlin Zoo, 2004
These barbary sheep and tahr posed nicely for me so I was able to do much more finished sketches that I usually manage.
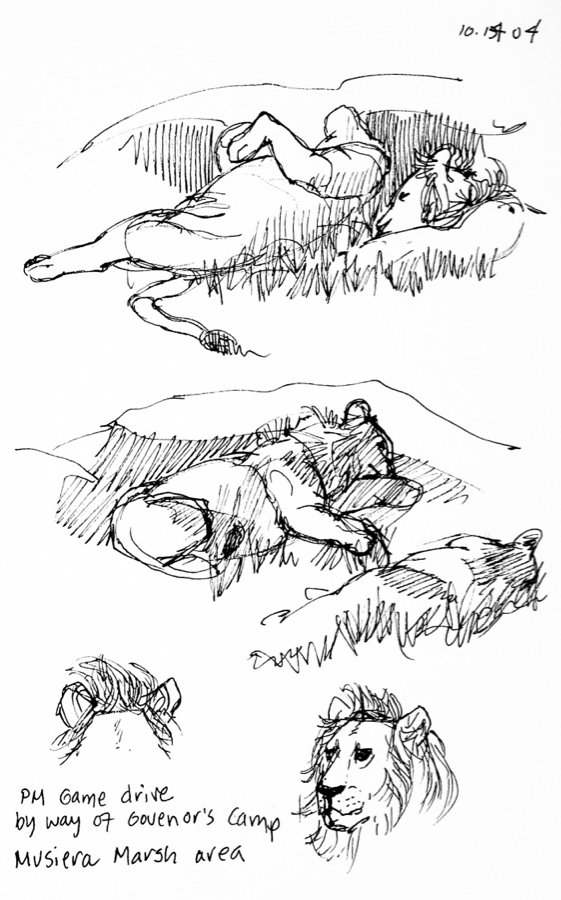
African Lions, Masai Mara, Kenya, 2004
I’ve had the good fortune to go to Kenya twice, once in 1999 and once in 2004 and would love to get back there sometime. We were driving to our campsite and came upon this lion and lioness in the throes of “temporary love”.
While animals are my favorites subject, I sketch pretty much anything interesting that crosses my path. I also like to record an animal’s habitat, which creates a specific kind memory that one doesn’t get from only taking photos.
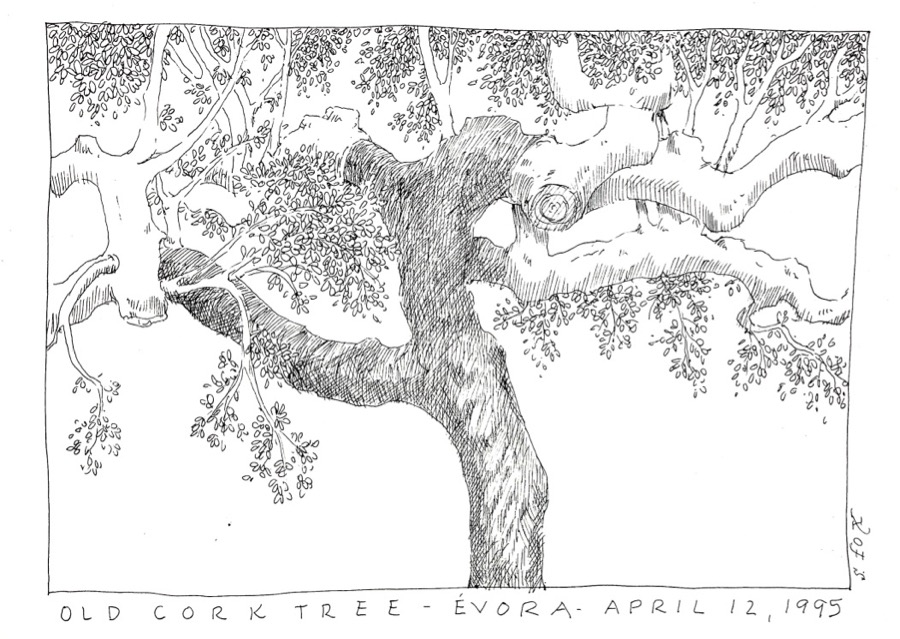
Cork tree, Portugal, 1995
On a trip to Portugal with a number of other artists we stayed at an old farmhouse that was surrounded by cork trees, the same ones that wine corks come from. They were full of character. I was interested in the twisting branches and trunk.
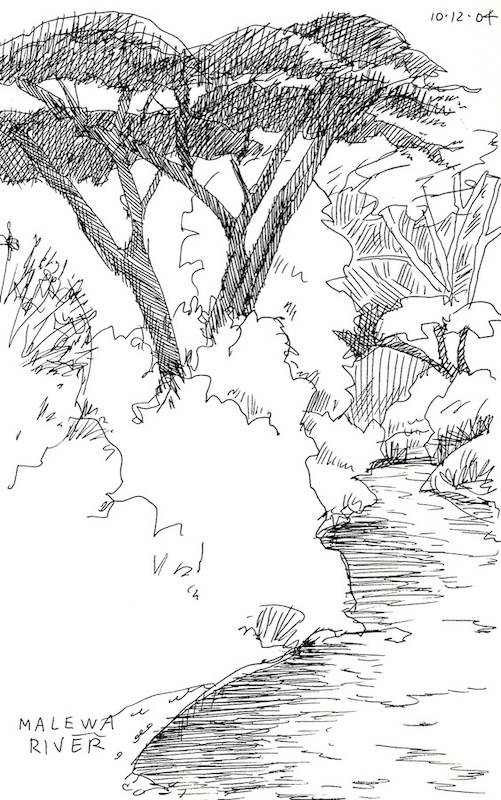
Malewa River, Kigio Wildlife Conservancy, Kenya, 2004
This scene was near the lodge we stayed at in the conservancy. I didn’t have a lot of time between breakfast and departure, so I focused on the river going back in space, the large, tree and left the rest of the vegetation as outlines.
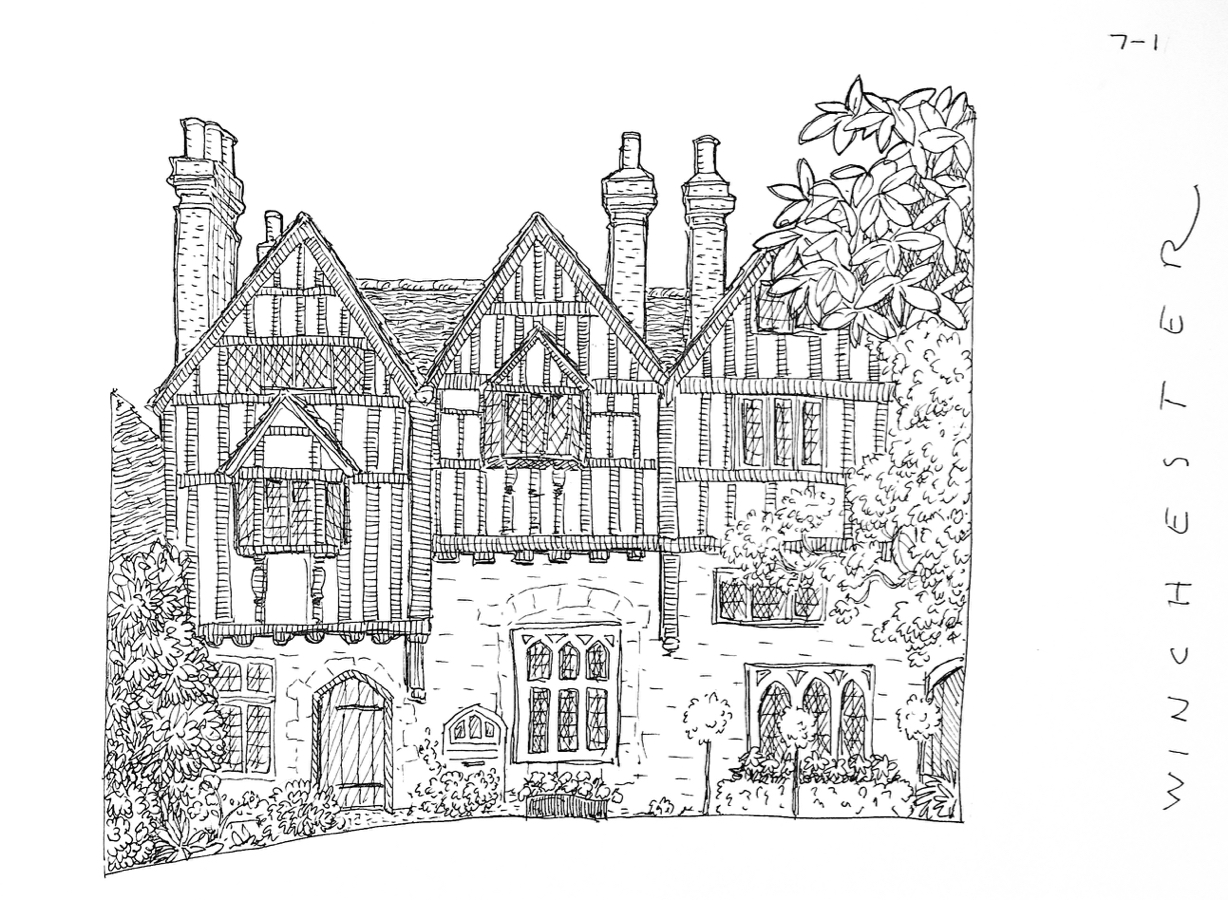
I’ve had the good fortune to travel to England quite a bit over the years. I love drawing the wonderfully picturesque historic buildings.
Winchester, England, 1995
I had plenty of time to lovingly sketch the half-timbering, windows and shrubs of this wonderful old building.
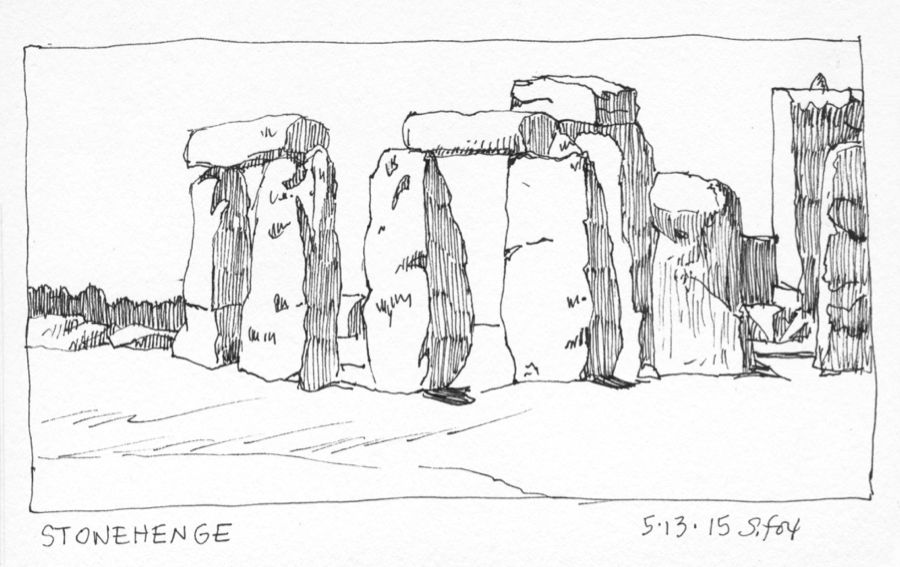
Stonehenge, England, 2015
Getting to sketch at Stonehenge a few years ago was a tremendous treat. In order to do a number of drawings from different angles I kept it really simple….the shapes of the stone themselves and then filling in the shadow sides.
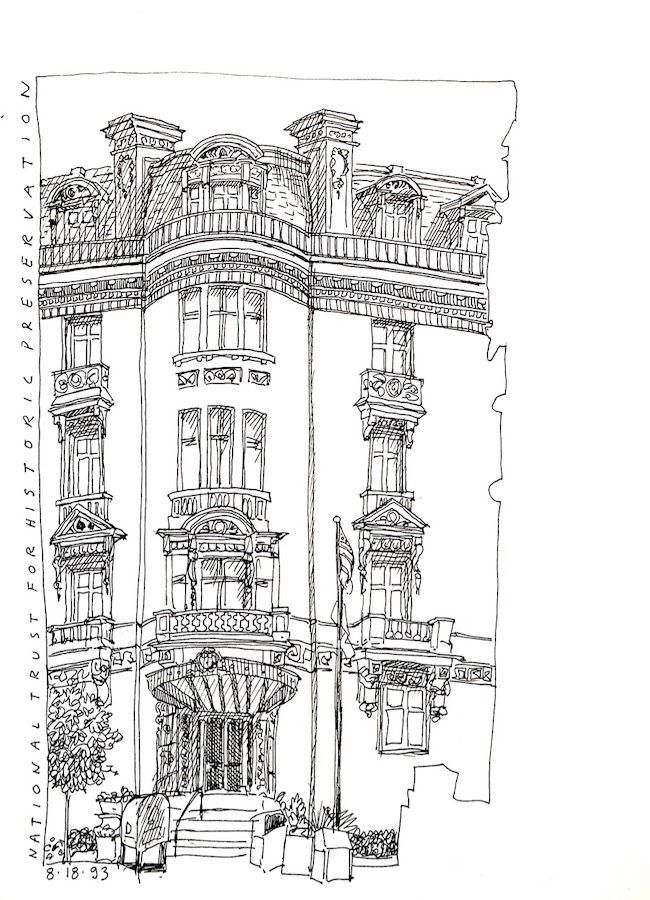
Washington D.C., 1993
I also sketch during trips around the USA. I enjoy playing around with edges, cropping in as needed. I didn’t want to bother with the building next to my subject, so I just left it as a silhouette in reverse.
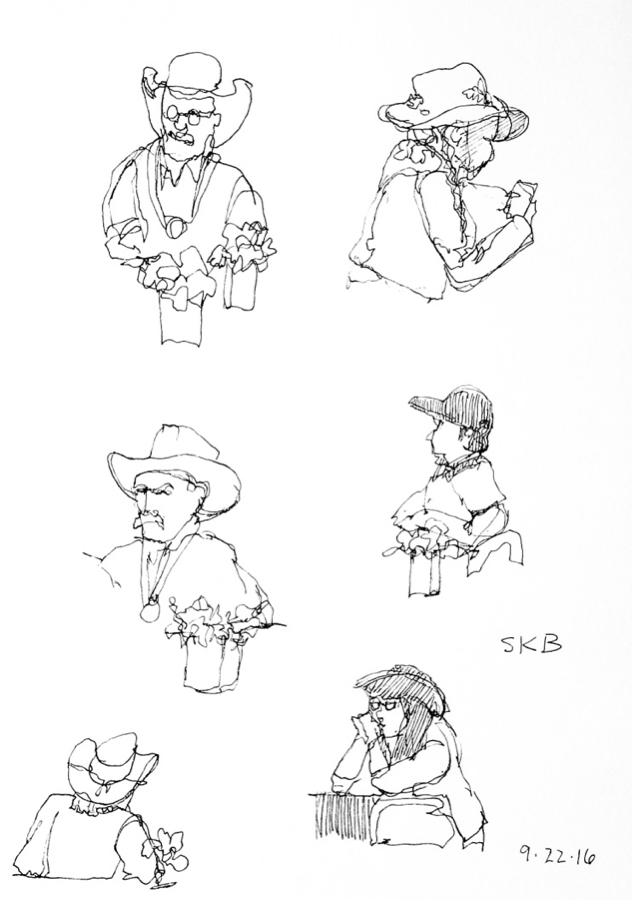
Susan K. Black Foundation workshop, Wyoming, 2016
When I did these super quick people sketches I was experimenting with contour drawing. None of them took more than a minute or so. I’ll be showing you how to do it.
The above sketches were done with pens, mostly Sakura Micron .01s. I also work in watercolor on location.
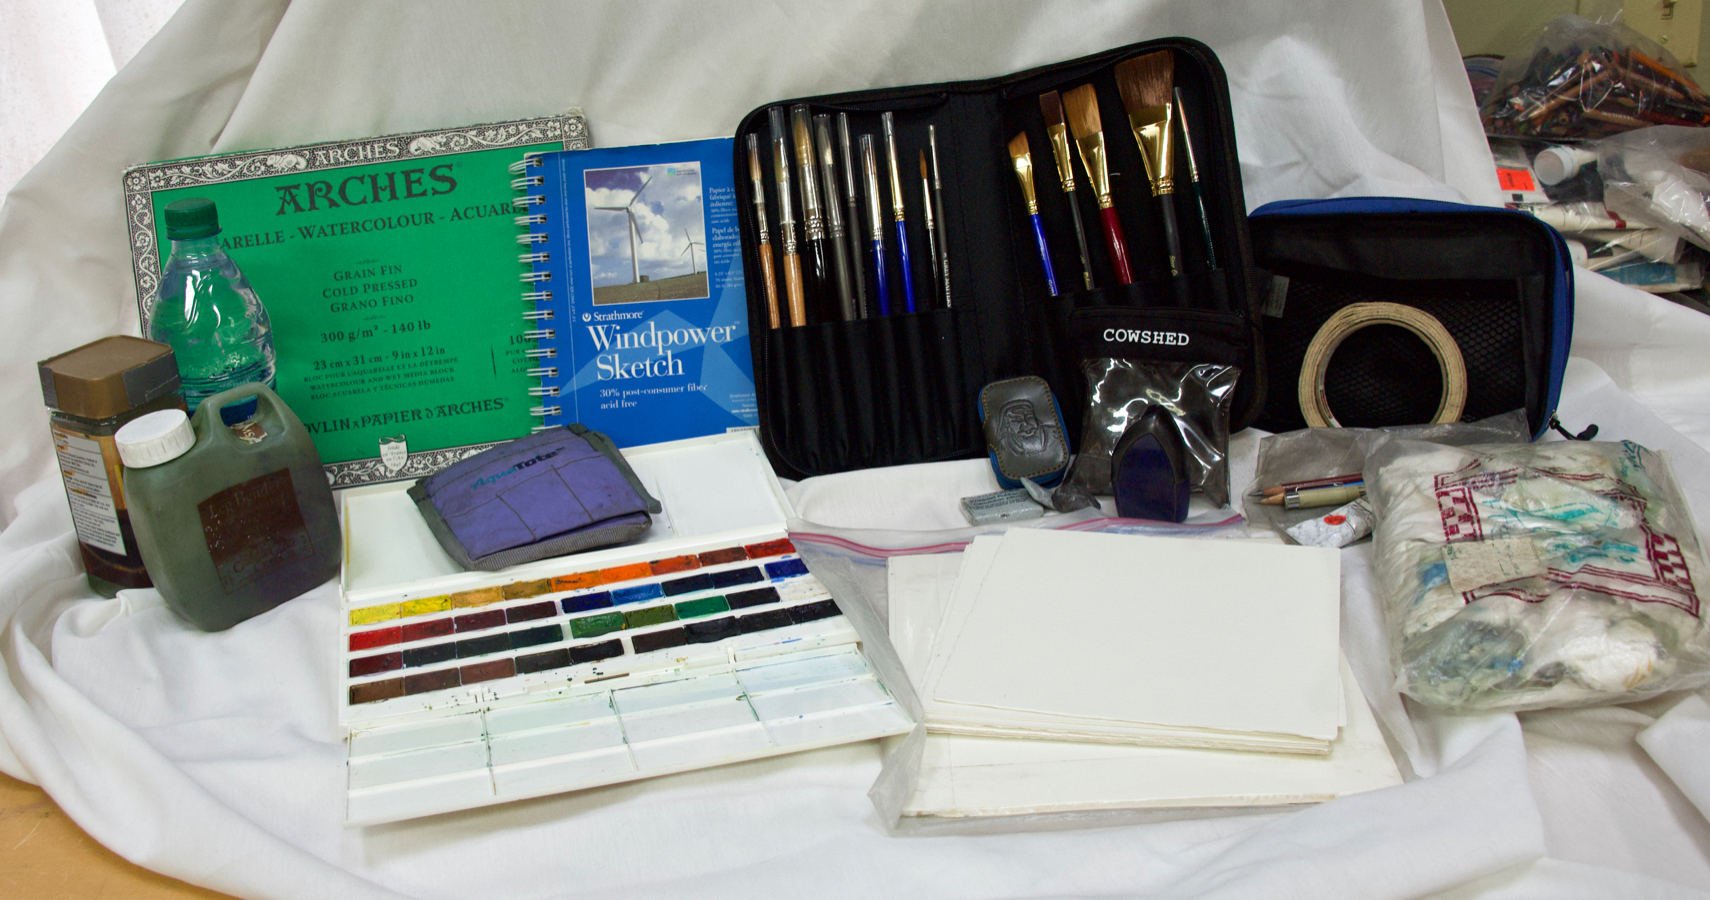
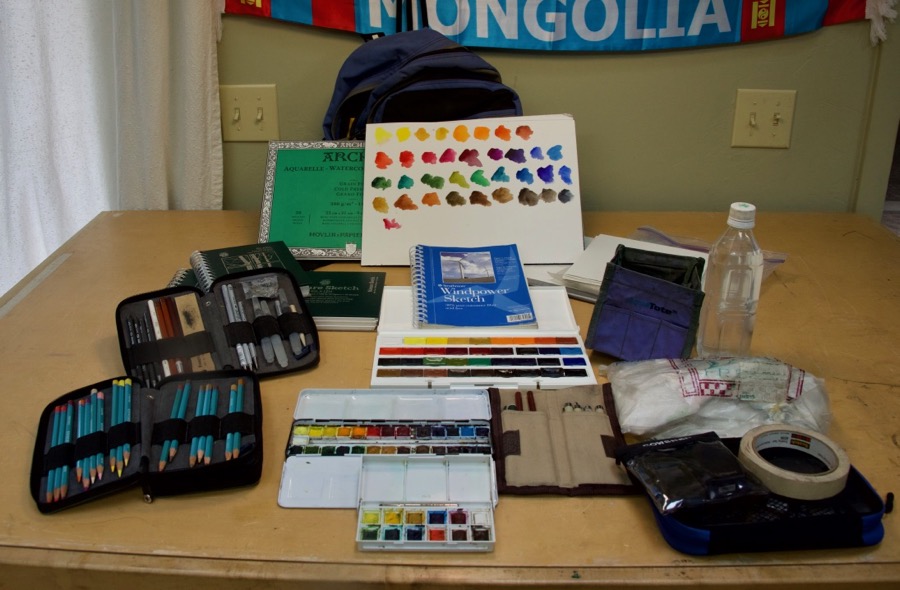
My current travel watercolor kit.
All of the above goes into an REI daypack.
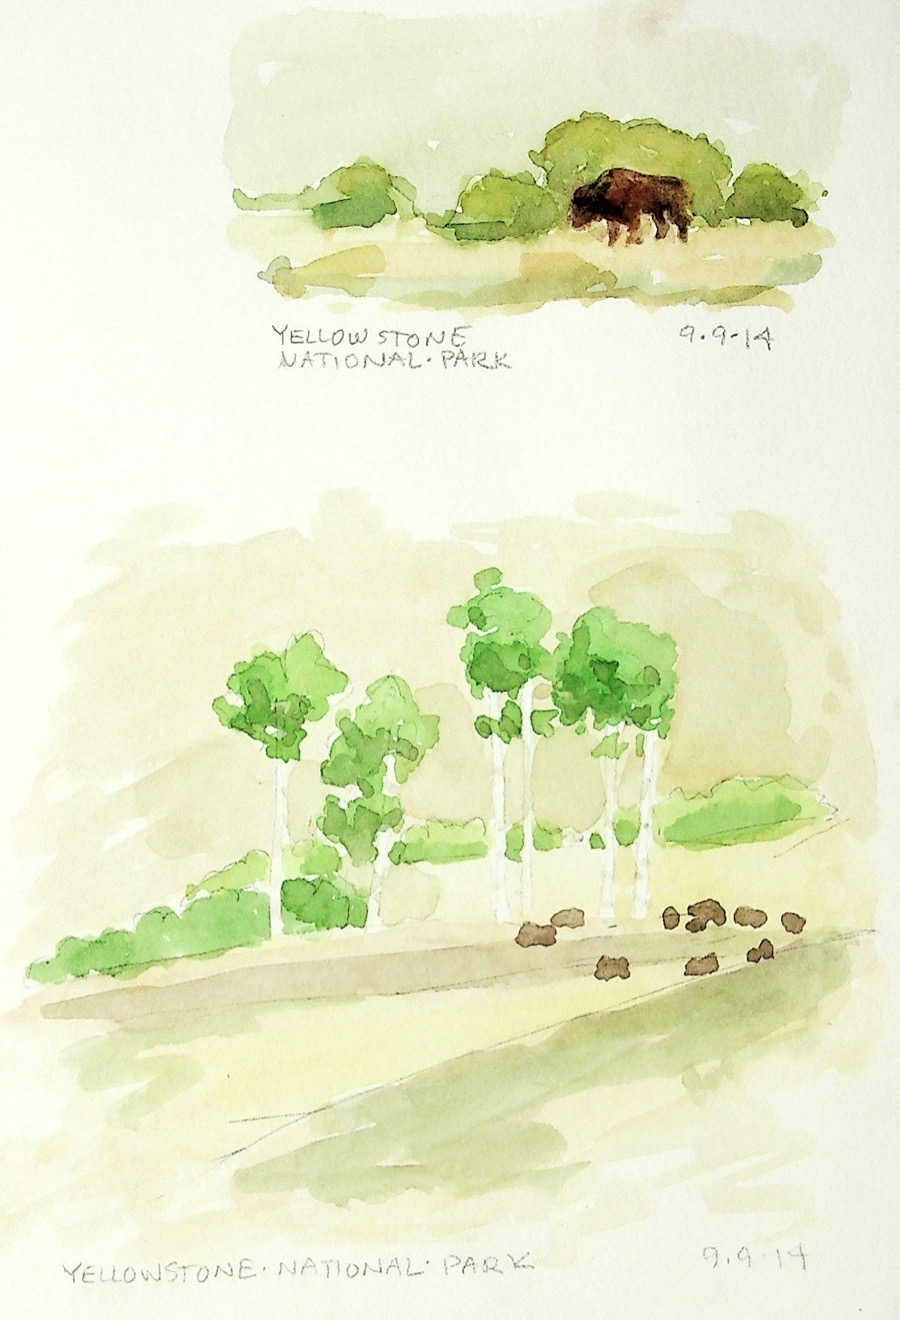
Bison, Yellowstone National Park, 2014
Quick watercolors just to capture the day and the bison.
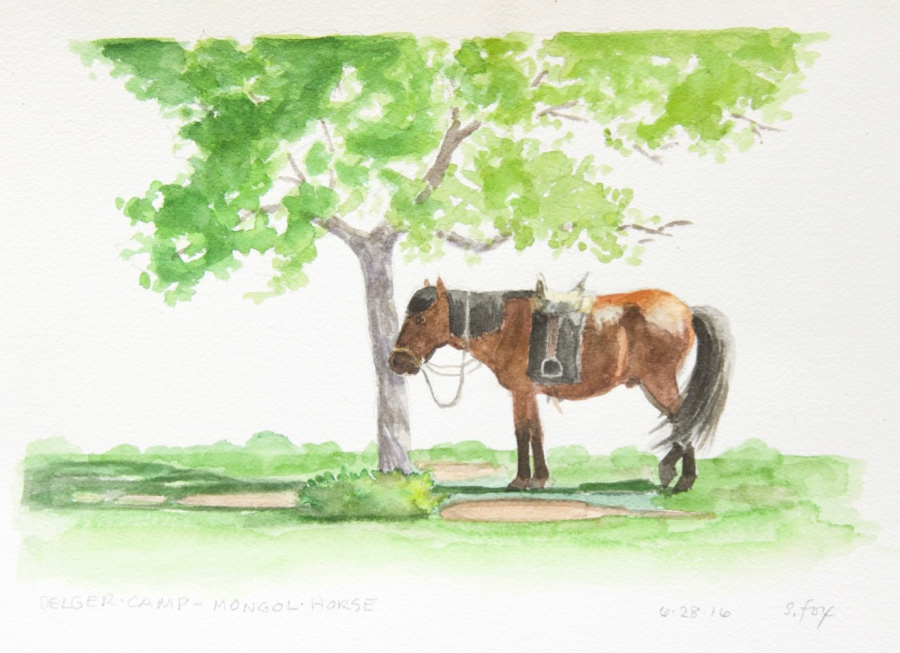
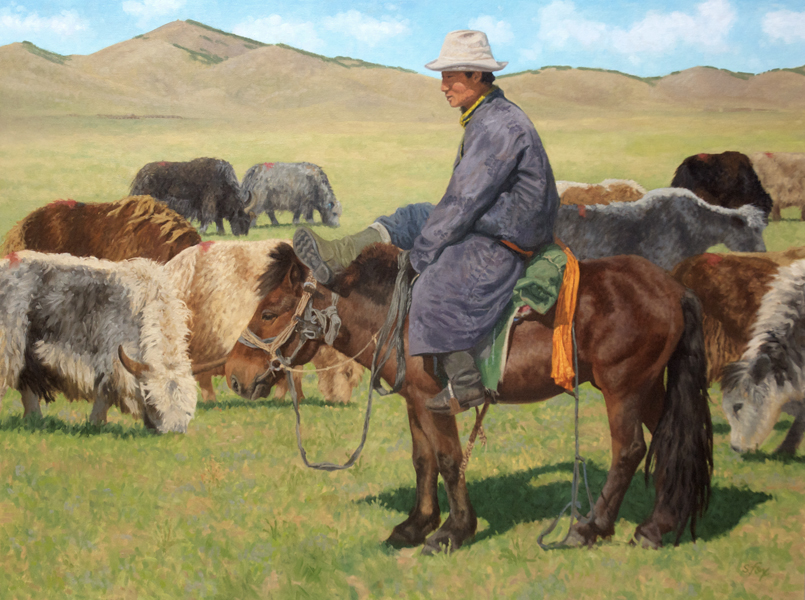
I spent a couple of hours on this painting, making sure that not only was the horse drawn correctly, but that the saddle and bridle were right. I went up close a number of times to check details. The horse would shift a bit, but then back into the position I’d drawn. Something to remember about sketching animals…they tend to move in a repeating pattern, so one can stop, wait, maybe start another sketch, then pick up the first one once your subject is back in place.
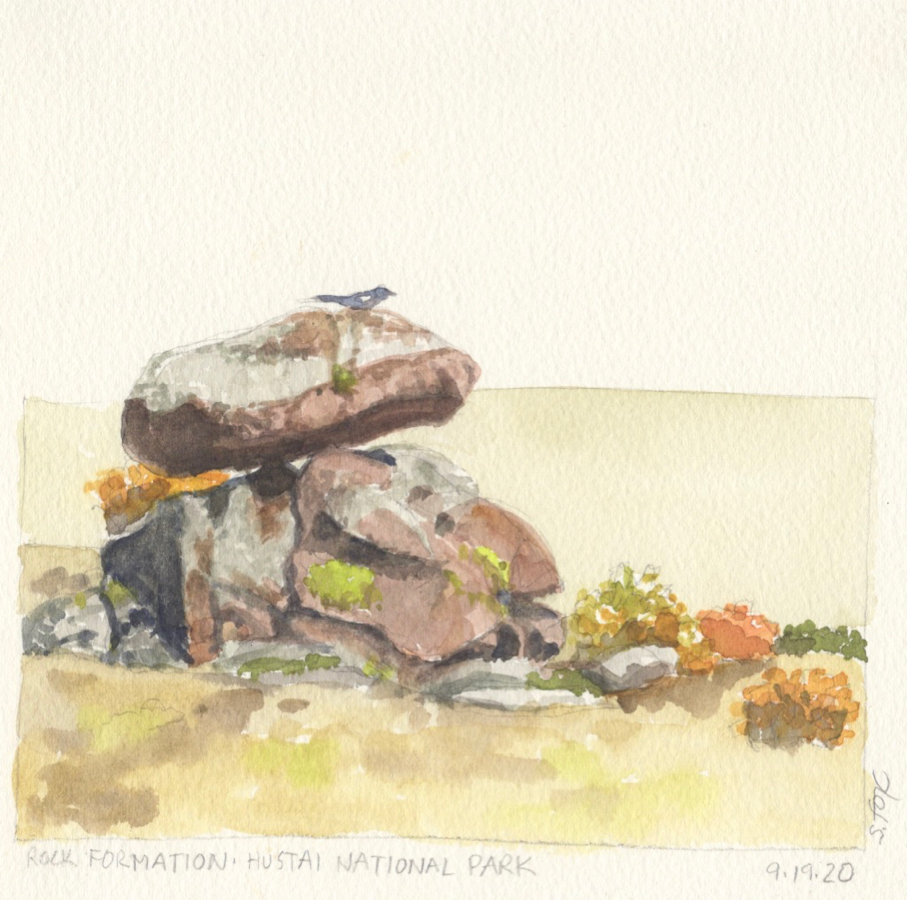
Bird on rock, Hustai National Park, 2012
I was sitting on a rock at Hustai, painting this interesting and colorful small rock formation and the surrounding fall foliage when the bird, I think it was a magpie, landed on the top one. I dropped my brush, grabbed a pencil and quickly sketched it in.
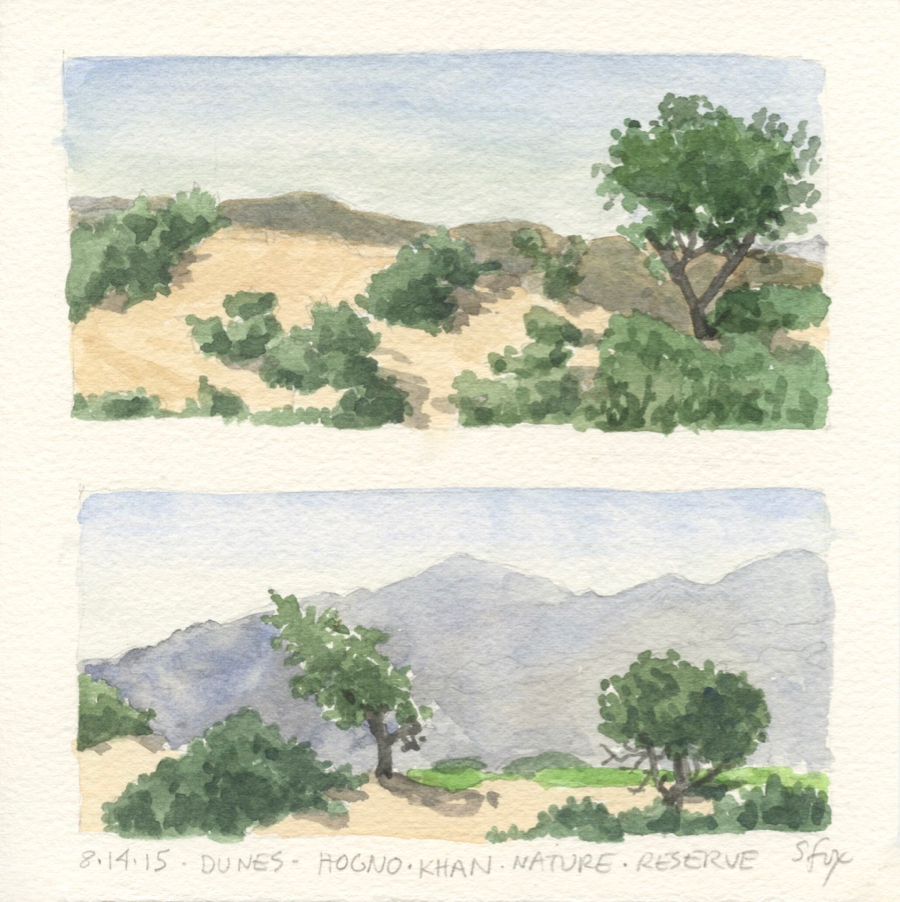
Dunes, Hogno Khan Nature Reserve, Mongolia, 2015
I carry a small stack of 8×8″ pieces of Sanders Waterford cold press watercolor paper with me in a gallon ziplock baggie, along with a small foamcore board with packing taped edges and a roll of drafting tape. I’ve found that I really like the small square size and can, as I did here, easily place two smaller horizontal format paintings on it.
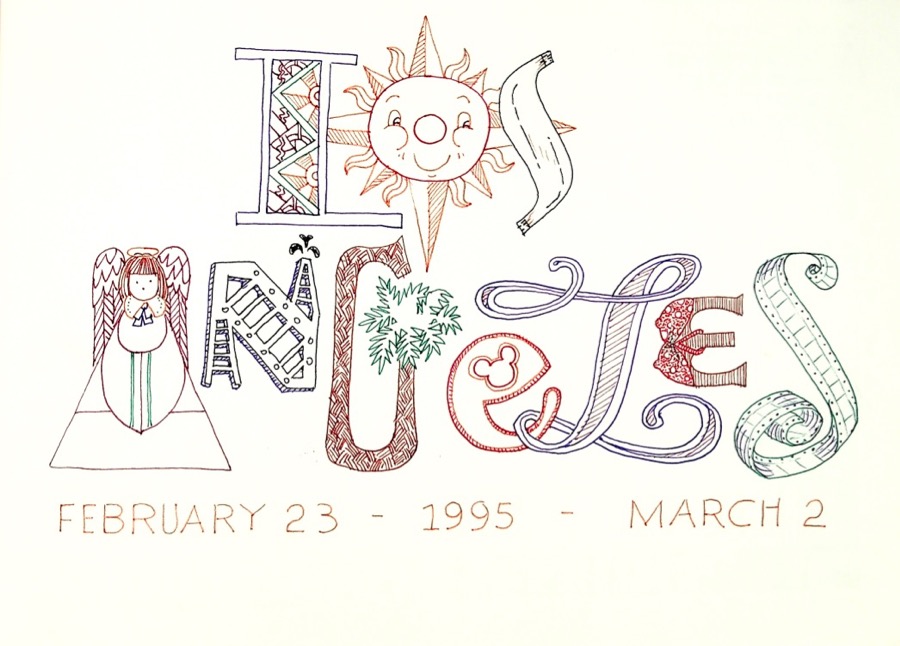
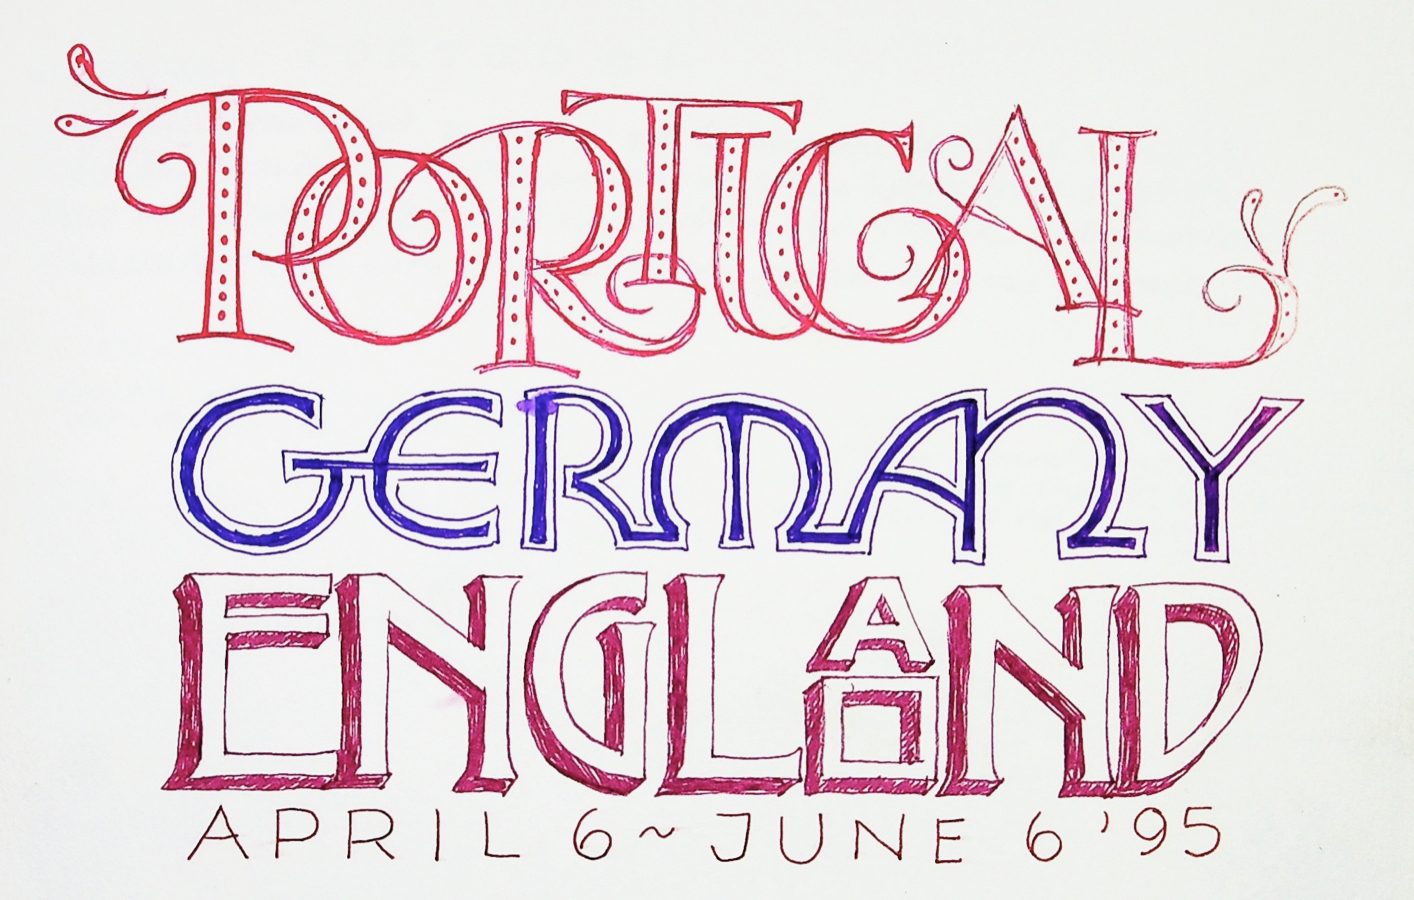
And, lastly, I’ve done calligraphy and handlettering for over forty years. Both are also undergoing a revival and I’m considering offering tutorials and maybe a online class or two for that. Here’s a few samples of my lettering…
Title page for 1995 trip to Los Angeles
Title page for 2016 sketchbook
Journal title page, Mongolia, 2016
From my illustration days, the heading for wine tasting calendar,
I’ll be posting the latest news about SketchWild here on my regular website and also in my Facebook group, FoxStudio. Let me know in the comments what you think and what you’re interested in learning!
I’ve done a number of posts over the years covering the art supplies I use both here at home and also take to Mongolia (along with other gear) which you can see here for 2014 and here for 2015. If you check them out you’ll see that not much has changed.
The major upgrade this year is my new set of Yarka watercolors (top). The plastic box of my old well-loved one was getting brittle, cracking with pieces coming off. The new one, which holds 36 pans instead of 26 is definitely bigger but the price from Dick Blick was too good to pass up. The color try-outs at the top of the first photo are all the colors, a number of them new for me. Below the Yarka set is a Winsor & Newton travel set of 26 colors. I carry it because some of the colors, like the Payne’s Grey (which has a lovely cool blue tint), are quite different than the Yarka equivalents. The little set at the bottom is also from Winsor & Newton. I can slip it, a brush, my foldable water container (the purple cube near the upper right in the first photo), a 7×5″ Pentalic Nature Sketch multi-media sketchbook and the drawing tools in the Derwent brown cloth holder into the pockets of my Domke photographer’s vest and not have to worry about the day pack. So it’s all super light and portable.
For paper I take a 9×12″ Arches cold press block and a couple dozen loose 8×8″ pieces of Saunders Waterford cold press, which I tape to a small packing tape covered “portfolio” with drafting tape. The portfolio holds the finished watercolors and also some sheets of toned drawing paper. I also have a small Strathmore Wind Power sketchbook for doing preliminary value studies and composition sketches.
To carry my brushes, I have a lovely zip case that I got at Cass Art in London a couple of years ago.
Inside are a variety of brands of brushes that have accumulated over the years, including Cass Art rounds, a flat and a bright; a Jack Richeson 9000 Signature Series round and flat; some Robert Simmons Sapphire rounds, flat and angled flat; the newest addition is a Gray Matters round from Jack Richeson; a couple of Stephen Quiller Richeson Professional flats; and a Robert Simmons One Stroke flat.
I also carry a good selection of Derwent water soluble colored pencils (top photo, lower left), which can be wetted with the water brushes I carry in my drawing kit. The drawing media and the colored pencils fit nicely into these zip cases from Global Art Materials and I really like them.
For drawing, from left to right above: Cretacolor Monolith graphite pencils, which are pure graphite with a thin coating of lacquer. They come in HB to 9B. Next is a Prismacolor white colored pencil since I take some toned paper with me. Then I have two Derwent Drawing Pencils in Venetian Red. They draw very nicely on the Pentalic Nature Sketch paper. I take at least two since they’re pretty soft and can get used up fairly quickly. Next is a General’s Draughting Pencil and then a sandpaper pad. I also have a retractable Exacto knife and a Swiss army knife for sharpening if the Maped handheld sharpener isn’t enough. The silver pencils are Derwent Watersoluble Graphitone pencils. Yes. Watersoluble graphite. I use the 2B, 4B and 6B. They’re wrapped in paper which can be peeled off for a larger surface area. They are also somewhat brittle and should be handled with care. I have a variety of brands of water brushes, but the reservoirs of most are too long for the case. I take a set of three Sakura Koi brushes which were the first ones I bought and one of the first on the market. At the end is a paper stump for blending. Above the water brushes is a small cut open plastic bag that holds a couple of kneaded rubber erasers. It’s taped to the inside of the case. This was a temporary hack that turned out to work just fine.
Not shown is my Moleskine sketch journal. It’s where I keep a diary of my trips and also draw and sketch using Sakura Micron pens. You can see my 2015 Mongolia journal and the art here.
Drawing media and watercolor brushes stored in a variety of containers and organized in one unit of a stackable inbox
I don’t necessarily consider myself a neat and tidy person. But when it comes to my work, I’ve gotten borderline fanatical about having everything sorted and organized. I don’t want an idea to strike or find I need to have “x” right now for whatever I’m working on and have to break concentration and hunt around for it.
I’ve been in my current studio space at our home for over ten years now, using a couple of IKEA cupboards for supplies and some thin plywood boxes with dowel dividers my husband made for me years before that for canvas and painting storage. The IKEA units are doing great, the old canvas “racks” were well past their sell-by date. So a few years ago we were able to hire a contractor who was also a cabinet maker to build new storage units from birch plywood to my specifications. What a luxury! But also practical and financially sensible because properly stored paintings and canvases (I use RayMar geesoed cotton canvas boards almost exclusively) are less likely to get damaged. Plus we live in earthquake country. Every cupboard, cabinet and bookcase is attached to studs in the walls.
Come take a tour of how I store my art supplies and equipment…
These units are in the northwest corner of the studio. On the left is an IKEA cupboard which contains all my supplies that aren’t in use. The top shelf holds greeting and notecard inventory in, yes, IKEA boxes. Next is a variety of containers. The next three shelves are drawing media, brushes, varnishes, odds and ends. Second from the bottom is paper for printing. And at the bottom are old sketchbooks. All the way on top is a speaker.
On the right is one of the custom storage units, designed to hold paintings up to 5×5′. The top two shelves have miscellaneous things that don’t fit anywhere else. The bottom holds all my oversize paintings and canvasboards. The curtain, just an old one I had around, is to minimize dust.
On the south wall of my studio are four units ranged next to each other:
These are two side-by-side IKEA cupboards. The one on the right, starting at the top, is blank sketchbooks, then small canvasboards and some stretched canvases with a gallery wrap so I don’t have to frame them. Second from the bottom are canvas pads and oil paper pads, a few small toned canvases and my watercolor papers. On the bottom is my plein air carry-all, a plein air panel box and some large size drawing pads.
The left cabinet holds my old paintbox I’ve had since I was a kid, a pochade box from the Sennilier art supply shop in Paris, more plein air carriers, then various paper towels and brush holders, finished small works (see detail below). Next, drawings to be framed or referred to, below them a black plastic file organizer and binders for location watercolors and at the bottom old work framed and unframed. The two stacked boxes hold plein air oils.
This is the middle shelf of the cabinet on the left. I’ve used cardboard drawing pad backing for dividers, labeling them with a Sharpie, to separate and organize old paintings from workshops, projects, preliminary studies, in-progress repaints, available for sale, etc.
And here are the closed cupboards above on the left, next to my frame and painting storage units on the right. Of those, the one on the left mostly has the frames. It was designed to fit over my steel flat files. The one to the right of it is pretty much all paintings except for some big manila folders at the top right which hold working and finished drawings and next to them about a half dozen framed giclees. All the shelves are adjustable.
Finally, here’s my painting table set up and ready to go. I clean the palette off on Friday afternoons and put the paint into one of those paper-lined round storage containers. My current palette is a leftover piece of Swanstone countertop. I got the idea from the Underpaintings online magazine some years ago. I like it because it’s a neutral color, it’s not reflective and once a film builds up on to a certain point, my husband is kind enough to sand it off for me. It’s the same color all the way through. As you can see I have an eclectic collection of containers for brushes, pencils, etc. Some are souvenirs of our travels, like the fish pitcher, which I got at a Debenham’s department store in London, England. I also like interesting coffee mugs with or without broken handles.
So there you have it, how one artist organizes her work life. If you have any ideas or want to share what you do, please leave a comment!
I have a 6am flight tomorrow to San Francisco, where I’ll catch a United flight to Incheon International Airport in South Korea and, after a bit of a layover, fly on to Ulaanbaatar on a Korean Air/MIAT codeshare flight (since United doesn’t have a Star Alliance partner who flies into UB).
For some years now I’ve been doing pre-departure posts on new equipment I’ve acquired. You can read last year’s, which also has links to the previous posts here.
Also last year I decided to try to have gadget charging available in the field and wrote about a Power Monkey Extreme. I ended up returning it before I left since the little solar panel was useless and pain to set up. But I’d still like to have some kind of alternative available and that’s kind of the theme for this year.
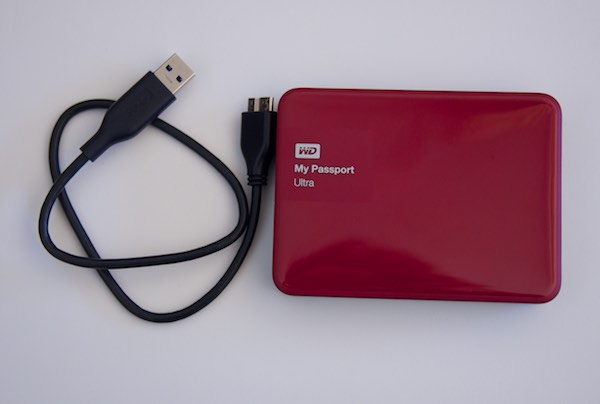
But first, at the top, is my new external hard drive…a 2TB Western Digital My Passport. WD seems to be the consistently reliable choice. It will replace a 250GB Toshiba, which I’ve used for years. My procedure in the field is to download my camera’s memory card into, as of this year, Photos, on my MacBook Air. I create folders on the HD and export image copies to those. So all my images and video are in two places. Three if at the end of the trip I don’t wipe the card. Since I now have two Nikon D750 camera bodies that shoot 27MB files, plus HD video and my total images shot for last year was 9,255, which could easily go up this year, 250GB wasn’t going to cut it. 2TB should be enough for the next few years, I hope. :0)
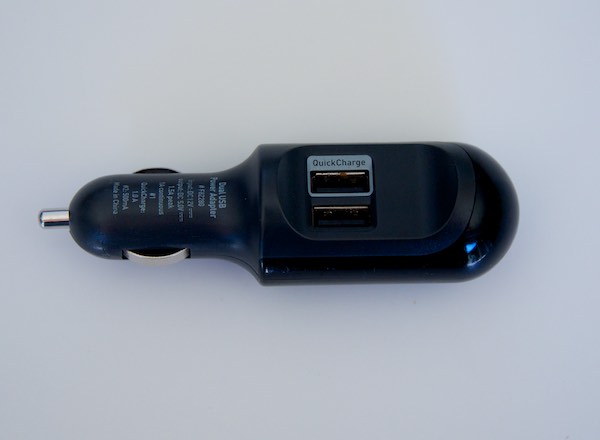
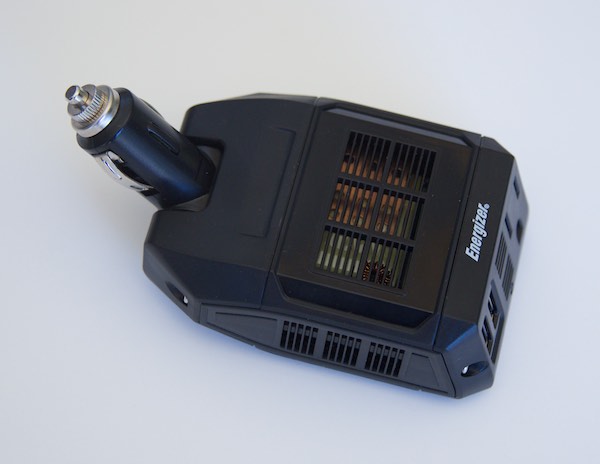
On to re-charging….I had a Kensington inverter that finally stopped working and wouldn’t seat firmly into the car lighter. I still have the Belkin inverter shown above, but as you can see, it only has USB ports. What to do? I’m going to take two options, both from Energizer. If you read the reviews on Amazon you find that there are quite a few options, but most of them are cheaply made and don’t last. Hoping the brand name choice will do better. So here’s the inverter that plugs directly into the lighter. It has two USB ports and one for a regular plug. My plan, based on past experience, is that I’ll be able to plug in my laptop and charge it while we roll and also my camera batteries. The drivers are willing to do that, but want it unplugged when stopped. They want no drain on the battery whatsoever, just in case. That’s what the margin for error can be out in the countryside. So travelers to Mongolia (probably true elsewhere also) with gear need to think this all through ahead of time. Pulling rank (I paid for this trip!) because you didn’t is not appreciated. I’m hoping the adjustable neck is a feature and not a bug. It only moves between two positions and seems to lock in firmly. A couple of weeks, possibly, in a Russian van on the earth roads will tell the story.
The charger below is one of those “I’m not sure I’ll use it, but it could be the PERFECT solution and only one, depending on the situation” purchases. It’s an Energizer 180 watt inverter with a base that rests in a cup holder. Clever. So less bulk hanging off the lighter, which the drivers will like. I also think anyone I’m with who’s driving a Land Cruiser will get a kick out of it. The Russian vans don’t bother with effete stuff like cup holders. I like that the charge base is stable and only a cord has to go into the lighter. I could plug almost everything into this one at once….the laptop or camera battery charger, iPad iPhone and will probably try it if I can.
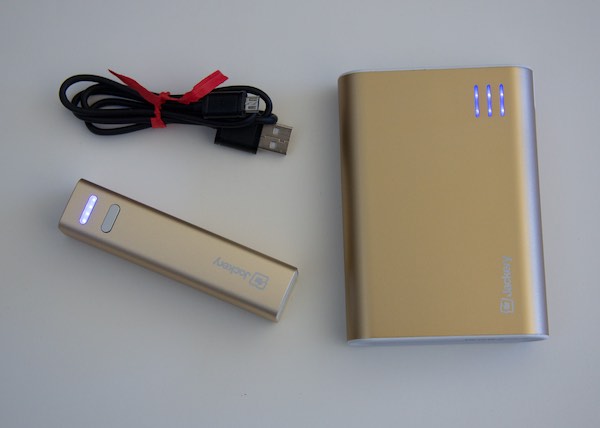
Finally, after searching and researching and reading the reviews on Amazon, I’ve settled on two sizes of Jackery portable batteries. I picked the lovely gold to match my iPhone 5, but they also come in black, silver and orange. This is a Three Bears deal: there’s a mini, a medium and a Giant+. My plan is to use the mini for the iPhone and the big one for the iPad and in a pinch. I’m hoping, the laptop just to get enough juice to finish a download.
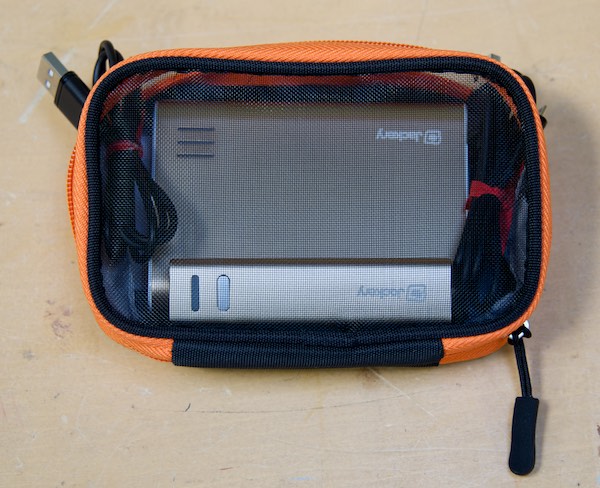
This is how I’ll carry them. It’s one of a set of three nifty, well-made zip cases I found at K-Mart for $15.
I also want to give an update on the little Altec Lansing speaker I bought some years ago. It’s the bomb. I reliably get 13 hours or so of music from the three AA batteries. The sound quality is still good.
Other equipment that is still with me and doing well is the KATA camera pack which I believe has unfortunately been discontinued, the hiking boots, sleeping bag, gear ties, tripod, Smartwool socks and earbuds. My faithful Domke photo vest, which I’ve had since my first trip to Kenya in 1999 finally has failed. Tears at the corners of the pockets that can’t really be fixed and places where the fabric is finally wearing out. I got online and, of course they’re not being made anymore either, but eBay to the rescue!. I scored a new vest in like-new condition for 20 bucks, including shipping!
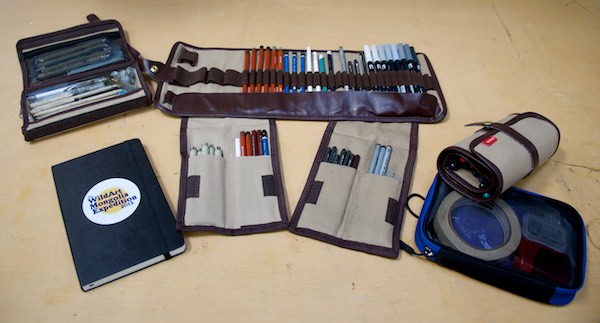
I’m planning to do as much art in the field as I can this trip, both drawing and watercolors. While we were London there was an art supply shop near where we were staying. They had some things that are not available here, like the small cloth Derwent pen and pencil holders. The larger one that rolls up is available from Jerry’s Artarama last I looked.
Watercolor supplies
Drawing supplies
As I have for some years now, I’ll use a Moleskine Sketch Journal to record the trip. One for the WildArt Mongolia Expedition and one for everything else.
Watercolor supplies:
1 Winsor Newton Cotman Travel Set
1 Yarka watercolor set (I have the color chart because I got some new colors and re-arranged the order of the pans)
A variety of brushes. The rounds are ProArte, Cass (the house brand of London art shop) and Robert Simmons Sapphires. I don’t use real sables anymore. The synthetics work just as well for my purposes, cost less and don’t require killing small mammals.
Saunders Waterford cold press 140lb. paper; in a block and also cut from a large pad into approx. 8×8″, a format which I’ve found I like a lot.
Pentalic Nature Sketch multi-media pads in two sizes; can also be used for drawing; indispensible now that they’ve upgraded the cover from thin paper to sturdy board
Plastic water bucket
Water flask
Homemade matboard support covered with clear tape for holding watercolor paper
Drafting tape
Small green pouch to carry the Cotman set, a small water container, paper towels, a brush; slips into the pocket of my Domke photo vest.
Drawing supplies:
Sakura Micron pens in a variety of sizes in black and brown
Cretacolor Monolith graphite pencil sticks in a variety of “B” softness; really, really liking these a lot
Derwent Graphitone water soluble graphite pencils in 2B, 4B, 6B
Derwent regular and Inktense water soluble colored pencils
Koi Waterbrushes in three sizes; for getting a tone with Graphitones or blending the water soluble colored pencils
Derwent Drawing pencils in Chocolate and Venetian Red
Staedtler Mars Lumograph pencils
Prismacolor brush and hard tip pens in shades of grey
A couple of other Strathmore sketchbooks; one white paper, one toned paper
I am proud to announce that I am now represented on the west coast by Strawberry Rock Gallery, located just up the road from me in Trinidad, California. They’ll be showing a complete selection of my work, including my Mongolia subjects like the painting above. Strawberry Rock is a full-service, locally-owned gallery. They just picked up the first round of my art yesterday, so I’m not on their website yet, but I’ll post the link when it is.
********
Artists are always on the lookout for the best places to buy supplies and equipment. I thought I’d share some of my favorites which have proved themselves over the years. None of the companies know I’m posting this so this list represents my honest opinions.
1. Hughes Easels– I’ve had mine for over ten years now and have never for a moment regretted spending the money for what is the best easel available. I bought the Model #4000 with two masts and highly recommend that choice since it holds large and/or long pieces more securely than one mast and lets me put diptych or triptych pieces next to each other or two smaller pieces side by side. Hughes Easels
2. Silver Brush Grand Prix- Like most painters I’ve tried a variety of brushes over the years and these are the ones I keep coming back to. I wear them down to half their length before they finally stop working and they hold a decent tip to the end. They have just the amount of spring and flexibility I like, having worked as a sign painter at the beginning of my art career. I’m ambivalent about using natural bristle brushes from an animal welfare standpoint, but have been unable to find a substitute, although the Silver Brush Bristlon comes close. Silver Brush Grand Prix
3. Winsor & Newton oil and watercolors– I do use specific oil colors from a couple of other brands, but good old WN has been my choice since I started painting in oils in 1997. Not sexy or expensive compared to many brands, but reliable and a pleasure to paint with. Also a good choice for someone starting out because painting is hard enough as it is without handicapping yourself by using cheap student-grade paint with low pigment/high filler content. I’ve used their watercolors since art school and after a long hiatus am using them again for location painting. Winsor & Newton
4. Strathmore Series 300 Bristol, Vellum Surface– My basic “good” drawing paper. It has just the amount of tooth that I like for drawing with pencils, Wolff’s Carbon pencils and General’s charcoal pencils. I keep pads of it in various sizes. I’ve tried the higher end Series 400, but don’t like the way it feels under the pencil. So the takeaway for this is that you need to try different papers until you find one you personally like (and, with luck, it won’t be the most expensive one). Canson makes an inexpensive recycled paper that I like for preliminary drawings. Strathmore
5. RayMar Canvas Panels– I switched to these years ago and have never looked back. Panels, as opposed to the traditional stretched canvas, became popular when plein air painting took off and, in fact, I first encountered them a a plein air workshop. I love RayMar’s cotton canvas panels which have just the right amount of tooth for me. Two major advantages of panels are that they take up a lot less linear shelf space than stretched canvas and the hard back means not having to worry about the canvas being dinged or a hole poked in it, so transporting paintings is a lot less stressful. They sell packs of standard sizes, but will happily do custom cuts up to 48″. Their quality has been absolutely consistent over the years and they’re a family-owned business. RayMar Art
Finally, something new (at least to me) that I’m just trying out but am very excited about. Forget Renaissance-era grid transfers, graphite transfers and oil transfers…
6. Optima Digital Projector– I have tried so many ways over the years to get a preliminary drawing done on paper onto the canvas, the grid being the main one. I’ve also tried doing the drawing at the final size and using a graphite transfer sheet. I recently learned about oil transfers from a great art site called “Underpaintings” (I’ve subscribed). But those methods I found time-consuming and imprecise, which just made for more work to get the drawing correct on the canvas. However, suddenly one fine day my subconscious must have finished its work because this idea popped into my head….why not do my drawings at whatever size and in whatever media I want? Then, depending on size, either scan or photograph them and dump them into Aperture, the image management software on my iMac. Plug the digital projector into the computer and project the drawing onto the canvas, then simply and precisely sketch it in. And, yes, I know I can do the same with the photos and will probably do that in the future for some simple subjects since I know how to draw, but what I love is being able to work from my drawings which is how I learn “what my subject looks like” in a way that I never could from just tracing a photo. So let me flatly say- THERE IS NO SUBSTITUTE FOR LEARNING HOW TO DRAW. I’ll probably do a future post about this transfer method as I move into my winter “painting season” and can document the process.
I’m two weeks away from my 2014 departure to Mongolia. When I’ve gotten new gear and equipment I do a post about it. You can read the previous ones here, here, here and here.
Looking back, I’m still using stuff I bought in 2010, including the REI jacket, KATA camera pack and the Toshiba external hard drive, which is the backup to my main image storage, a MacBook Air. The Nemo Nocturne sleeping bag, purchased last year, was a success, as was the cover for my iPad, but I’d still like to find something that provides a little more protection, but isn’t made from leather. The transport case got 15 original oil paintings to Ulaanbaatar undamaged and I’ll be using it again this year (more on that next week). My two Nikon D80 bodies with their Nikkkor 28-300 and 80-400 lenses are taking one more trip after a professional cleaning. They have served me well, but newer bodies like the D610 have some features that I know I’d really use, like in-camera video. In the meantime, the Panasonic camcorder also goes one more time.
Below is the list of art supplies I’m taking this trip. The new additions are in the photo above. I really like the Nature Sketch from Pentalic. It seems to take all media nicely, including watercolor. The only thing I would fault them on is that the cover is flimsy and gets beat up easily. I’m going to put packing tape around the edges. I’m taking my Yarka watercolor set, but also bought a Winsor Newton Cotman watercolor travel set for its small size that lets me slip it into the pocket of my photo vest or the old point and shoot camera bag that forms my “portable art studio”. I also got some Koi Water Brushes in three sizes. I got the idea for these from a blog post by James Gurney. They are the same plastic-barrelled, nylon-tipped brushes with a reservoir holding different colors that you see sets of, but are empty. Gurney had one with water and a couple with dilute ink in them. A very fast way to lay down a tone without having to carry a water container and separate brush. I tried one out yesterday, doing a quick sketch of Alexander with a pen that doesn’t have permanent ink and then using the brush over the ink to create a wash tone. I liked it.
Here’s the art supply list for Mongolia this year:
Old point and shoot camera bag holds all the art media except the Yarka watercolor set
Moleskine sketch journal, usually two
Spiral-bound Nature Sketch sketchbook 7×5”
Sakura Micron pens- black and a few colors, .01 to .03
Derwent water-soluble colored pencils
Derwent drawing pencils- HB, 2B, 4B, 6B
Kneaded rubber eraser
Small pencil sharpener
Yarka watercolor set and Winsor Newton Cotman Watercolor travel set
Winsor Newton white gouache (tube color)
Sable watercolor brushes, round- 4, 8, 10; various flats
Waterproof folding water “bucket”
8×8” loose pieces of 300 lb. watercolor paper-(a couple dozen)
9×12″ Arches cold-press block
7×10″ Cartiera Magnani “Annigoni” toned 100% cotton block
8×10” piece of foamcore to hold watercolor paper
Roll of 1/4” drafting tape (low adhesion) to attach watercolor paper to foamcore
I’ve never bothered to take a tripod to Mongolia because, for what I’m there to see, there’s never time to set it up. The animal or person or light would likely be long gone, not to mention the weight of my very nice full-sized Manfrotto with the gimballed head. But last year, one of the other people on the Expedition was doing some night photography and her pics were great. Well, you can’t beat Mongolia for nighttime skies in the countryside since there is no light pollution at all. So I searched around and on the B&H site I found this MeFoto tripod that got good reviews from photographers who travel and use it in the field. It does sacrifice some sturdiness, but seems well-made overall. It’s also only 12.4″/315mm in length folded up and weighs only 2.6lbs/1.20kg. It unfolds to 51.6″/1310mm in height. The plate that holds the camera body let me mount the camera quickly and easily. In my studio. So we will see how it does in real field conditions. You can get them in a variety of accent colors. I went for red.
My old LL Bean light hiking boots have served me well, but were always just a mite short. It got uncomfortable last year, particularly in hot weather when one’s feet swell up. Time for a change. I found these Merrill Salidas at our local outdoor store. Not wild about the lavender accent color, but they were comfy the minute I put them on. They are breathable and water resistant, both desirable in a Mongolian summer that can oscillate from heat to rain to cold in just a few hours.
Finally, what I hope will be a main solution to the recharging-in-the-field challenge. I’m usually able to use the lighter in the vehicle with a Kensington adapter that has a regular outlet on one end and the lighter insert on the other, but last year there was an odd wiring situation in my van. I’d plug in my iPhone or battery charger and we’d roll, but nothing would happen. If the driver stopped or even turned off the ignition, charging would occur. Go figure. But considering we were a LONG way from anywhere, it was worrisome, especially the camera batteries. So I’m going to take this PowerMonkey Extreme, which has a small solar panel and a battery pack, as backup. The sun shines in Mongolia 274 days a year, so it’s a natural for solar recharging. The problem is that flexible, roll-up panels are fairly large and there’s no guarantee of being in one place long enough for it to charge a battery. The drivers are justifiably very conservative about laying or attaching anything they’re not familiar with on or to their vehicles since they will be stuck dealing with the consequences if there’s a problem. “What could possibly go wrong?” is not a good way to operate in the Mongolian countryside. I’ll be trying it out here at home, but won’t know what it will do when it counts until, well, it counts.
So that’s the gear report for this next trip. If you have any questions or thoughts, please leave a comment!